
TL;DR
In this blog post, I thoroughly describe my successful attempt to use a Machinist X99 motherboard that I bought from Aliexpress. While I was expecting my (high) hopes to be disappointed, it turned out to be a fun learning experience.
I read a lot of articles on the Web that describes the “happy path” (meaning that everything seems to work at first). In this article, I try to detail everything that went wrong: please tell me what you think.
Some context
From 2020 to 2024, I had a Shadow Gaming PC. This video game streaming service proved that one can stream low latency application (namely videogame) over the internet), and it inspired me to do the same at home. I was a happy user, but ended up unsubscribing to the service because:
- it became more expensive at ~50€/month for the more advanced configuration
- I was worried that the Shadow PC gaming client would stop working on NixOS:
- Nicolas Gilloux and the team made an excellent job in order to port the Shadow PC client to NixOS. They worked on it for a long time but ultimately discontinued support.
- I ended up forking their github repository and maintained my own for a few months/years: while it was low effort, it was frustrating to pay for a service on one side and to use my personal time on the other side
This gave me an idea though. Here it is:
- installing a proxmox hypervisor
- creating a Windows 10 VM
- configure a PCI-E passthrough in order to pass the graphic card to the VM
- provide a USB passthrough for the XBOX 360 gamepad wireless receiver (no need to add latency when the client and the server are in the same room)
- install the sunshine streaming service in the VM
Thanks to sunshine , I could play remotely on my laptop using Moonlight with an integrated graphic card and it proved to be excellent.
There was one small hicup: my hardware configuration was a PC laying around and it was not exactly brand new: it was a AMD FX 6300 six-core CPU with 24GB of DDR3 RAM and a GTX 750Ti graphic card. It served me well and this was the configuration I use to play videogame for more than a year. I managed to play to Half Life 2, F.E.A.R. 1&2, all the S.T.A.L.K.E.R. trilogy and Animal Well from start to finish.
As I saved money when I stopped using the Shadow PC gaming service, the plan became to upgrade my configuration. However, the computer hardware industry didn’t help me much here:
- GPU pricing never came down for the past few years (if anything, it increased)
- SSD and NVME pricing went up
- RAM pricing went up
The Christmas season would bring me a brand new Nvivia RTX 5060 graphic card, and I was starting to be worried that my present configuration would not be sufficient.
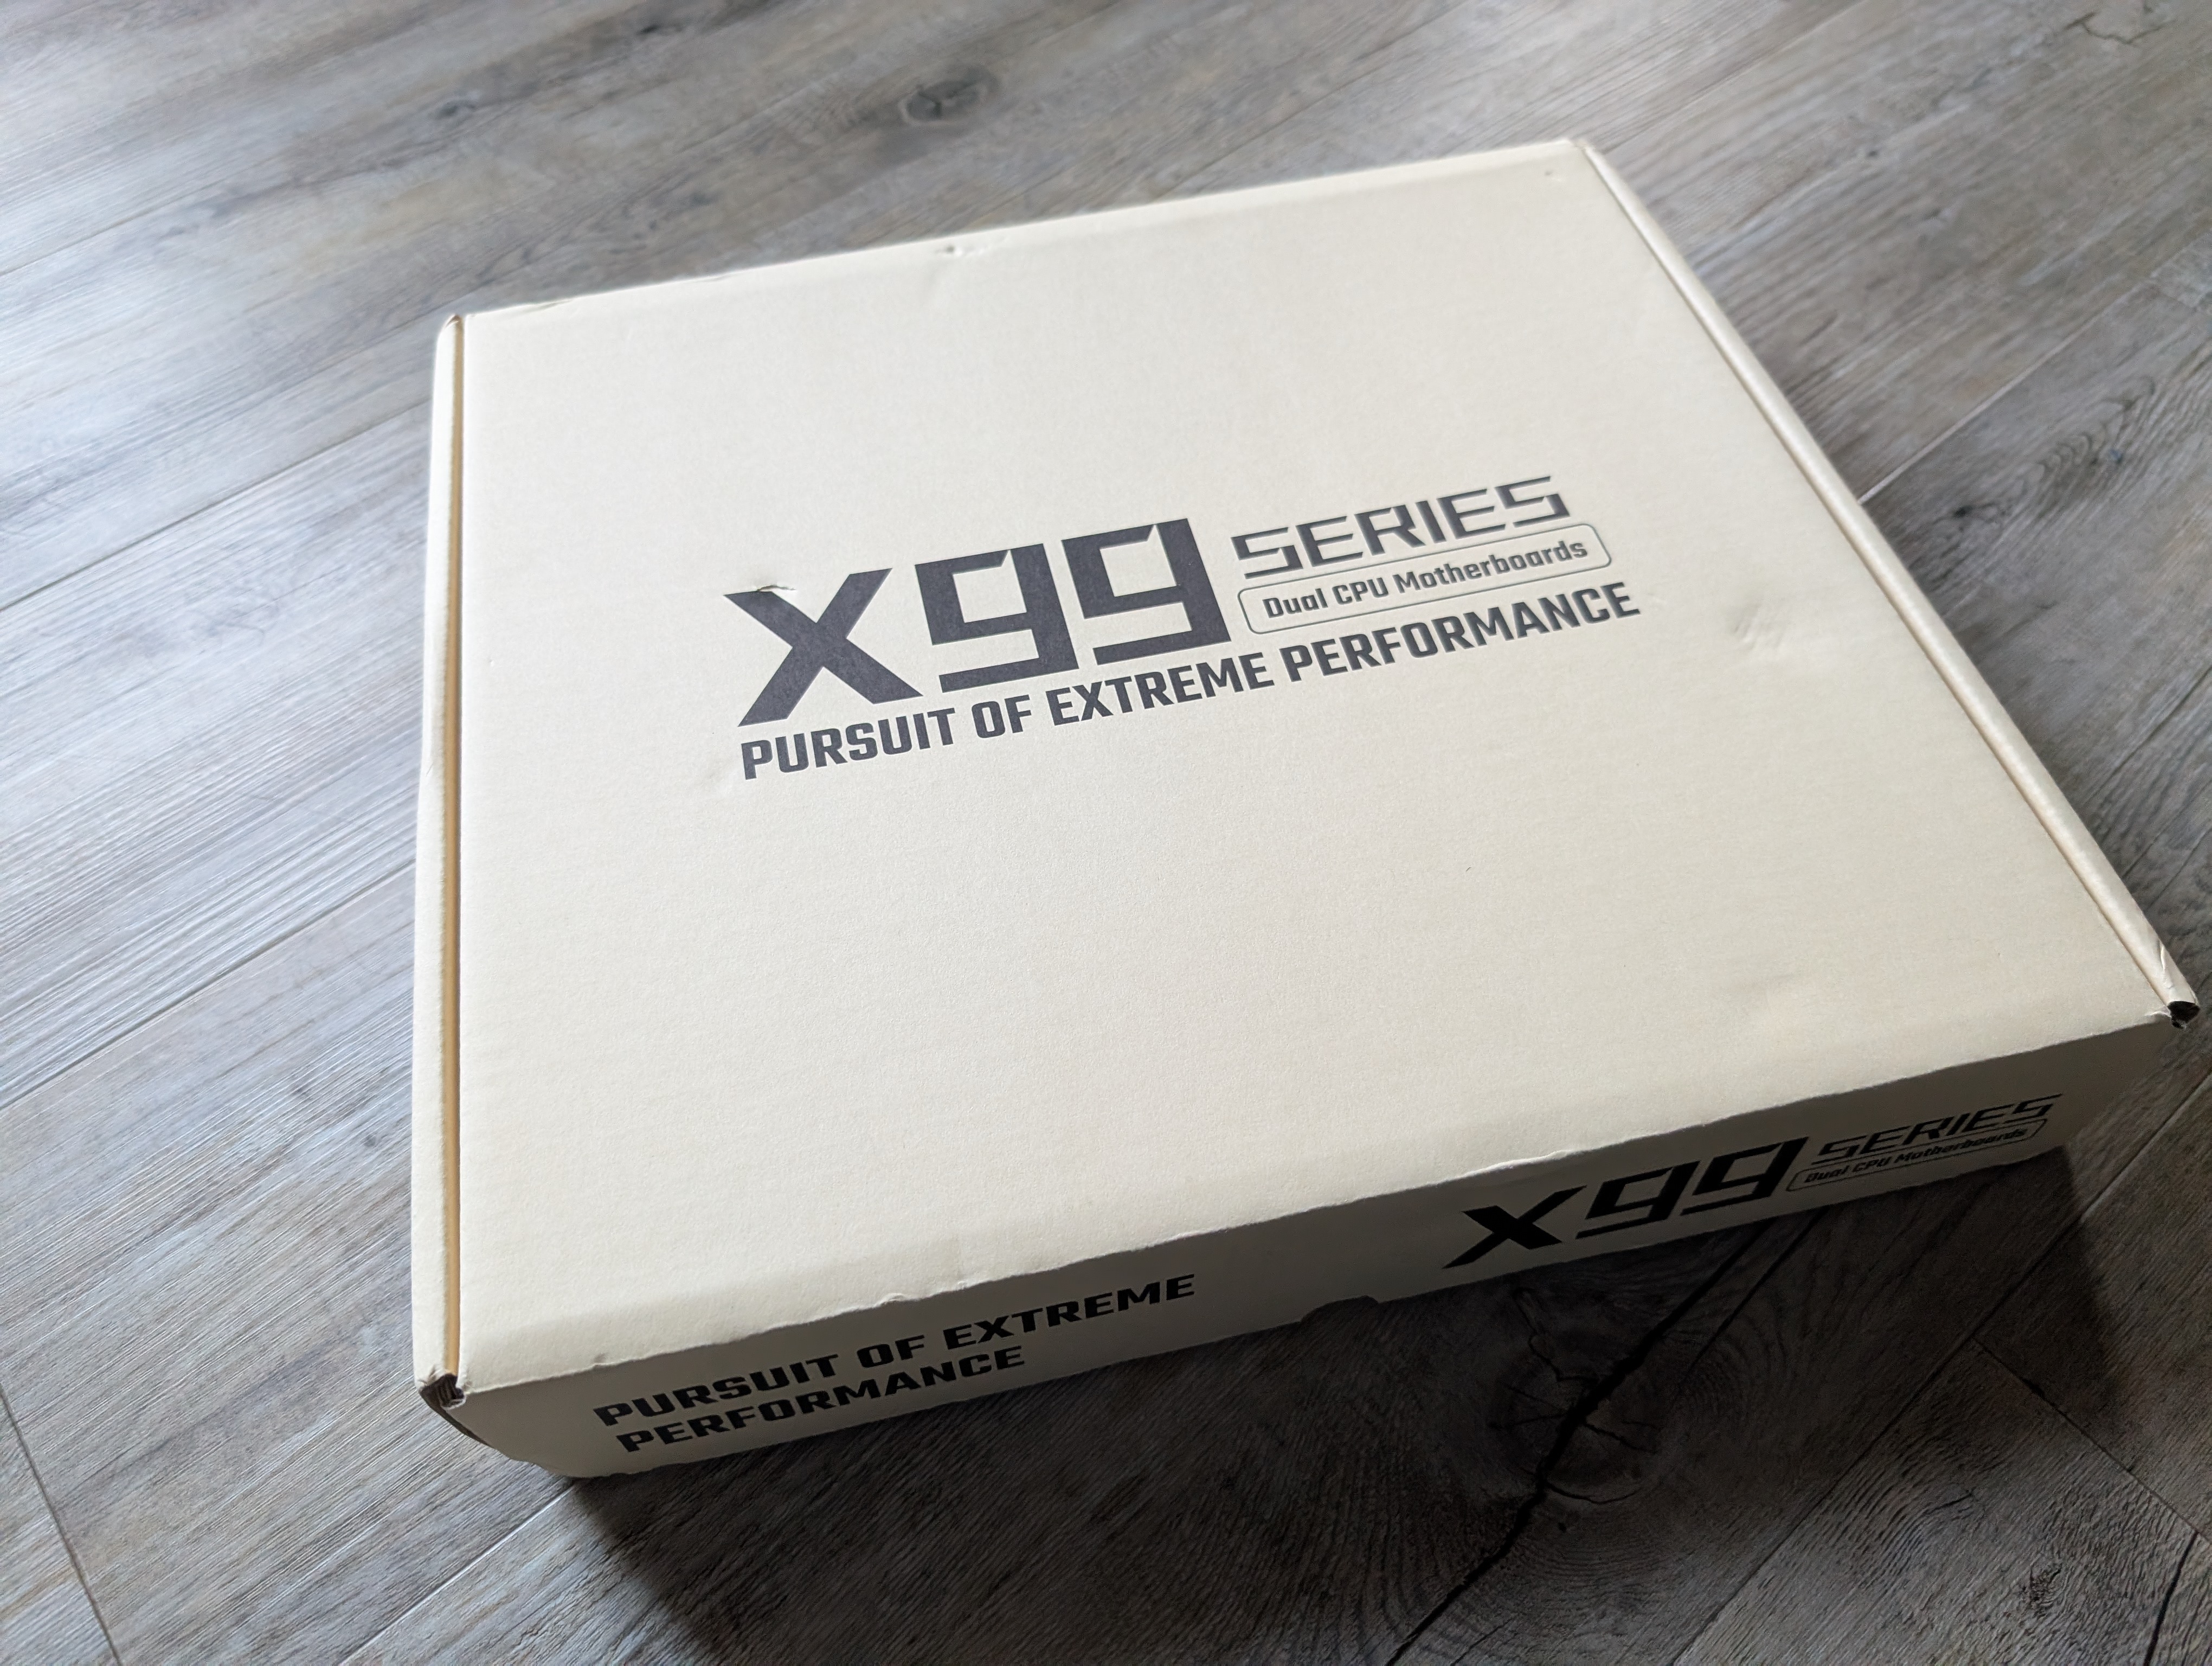
I was beginning to give up hope, until I found this advertisement for a cheap motherboard + CPU + RAM combo (114€): MACHINIST X99 MD8 Kit de carte mère double CPU en option intel Xeon E5 2680 V4 LGA2011-3 DDR4 32GB RAM C612 puce serveur ordinateur
The plan
The Aliexpress advertisement sounded to good to be true, so I had to order one and make sure. All for science purposes, of course. The advertisement was, from what I understood back then, a deal for 114€:
- 2 x Intel Xeon E5 2680 (14 core each): yes, that 28 cores total, or 56 cores with hyperthreading
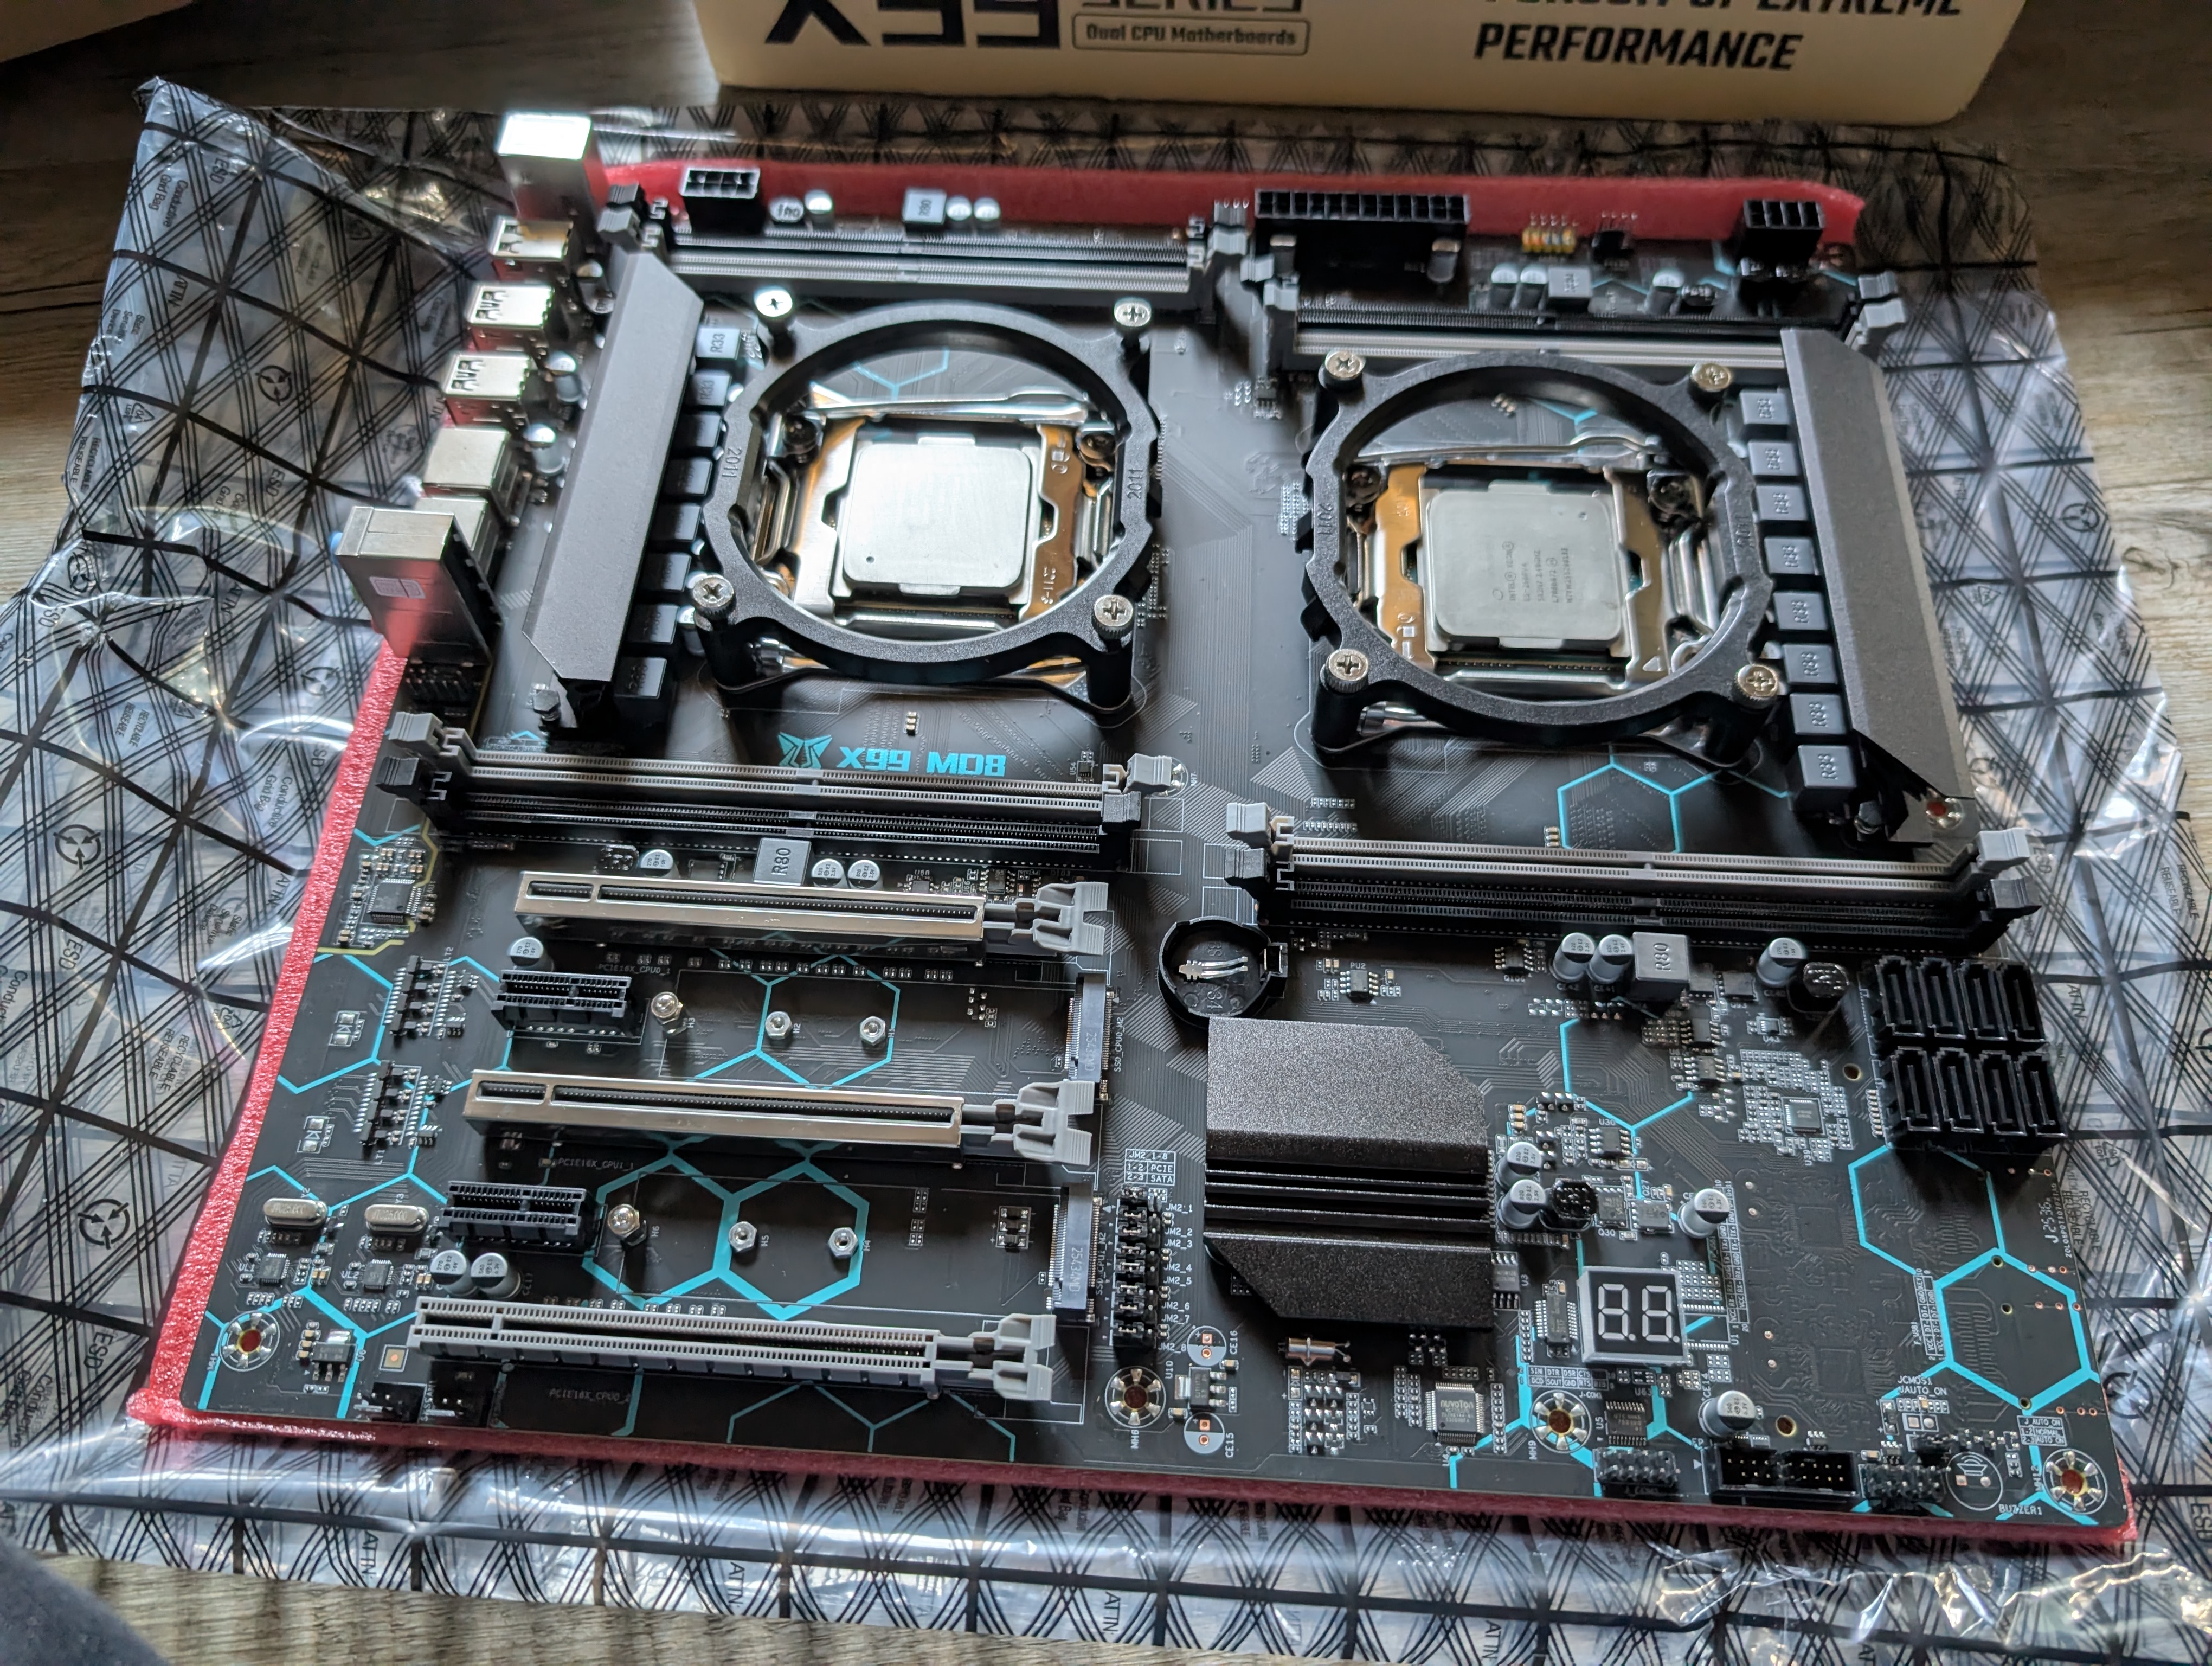
- a Machinist X99 MD8 motherboard (brand unknow to me at that time)
32 GB of RAM: it later turned out to not be present it the deal but I didn’t know at the time
The motherboard itself seems quite interesting, if a bit shady. The technical description provides additionnal information on connectivity 6 SATA, 4 PCI-e, 2 NVME-e ports, etc. It all seems to good to be true.
I checked that I had the prerequisites before I placed an order. The prerequisites I identified:
- a Tower Computer case (here a Fractal XL R2 from 2015)
- a 650W power supply
- a CR2032 battery (for CMOS) as it would be missing from the build
I was missing two heatsink + fan combo, that I also order from Aliexpress for around 20€ each.
The shipping was quite fast (less than 10 days) and I started receiving things a few days before Christmass.
First thing to go wrong in the plan: the missing RAM
I initially though I ordered a combo of motherboard + 2x CPU + RAM.
My first surprised was when I opened the package: the RAM was missing.
I then re-read the description of my order: it says it’s a motherboard with an option for 2 CPU and 32GB of RAM. Well, to be more specific, it’s:
- 1: motherboard, or
- 2: motherboard + 2 CPU, or
- 3: motherboard + 2 CPU + RAM.
I though I was ordering RAM configuration (3) but it turned out, I ordered the motherboard + 2 CPU configuration (2). It all comes down from the fact that the title is misleading and that the third option is now absent from the offer but still present in the description (probably related to the RAM pricing going up).
While I felt very silly for a few minutes days, I spent some times checking my options, like reusing DDR4 (turns out I don’t have any), before I started perusing the motherboard manual. I needed “Registered DDR4 ECC” modules for this kind of processor.
There was only one conclusion: all I had to do was to buy some RAM. I set out to find 32GB or 64GB with a 60€ budget (hey, it’s old RAM right?). How difficult could that be?
Long story short: it required me a few hours, browsing ebay and such, before I found a seller on “le bon coin”, that was selling 2 sticks of “RAM Kingston 16 Go DDR4 ECC Registered” running at 2999Mhz. It seems it was the only seller that didn’t follow the RAM pricing hype lately. The delivery was pretty quick and I received the sticks a few hours before the Christmas Eve.
Second thing to go wrong with the plan: turning it on
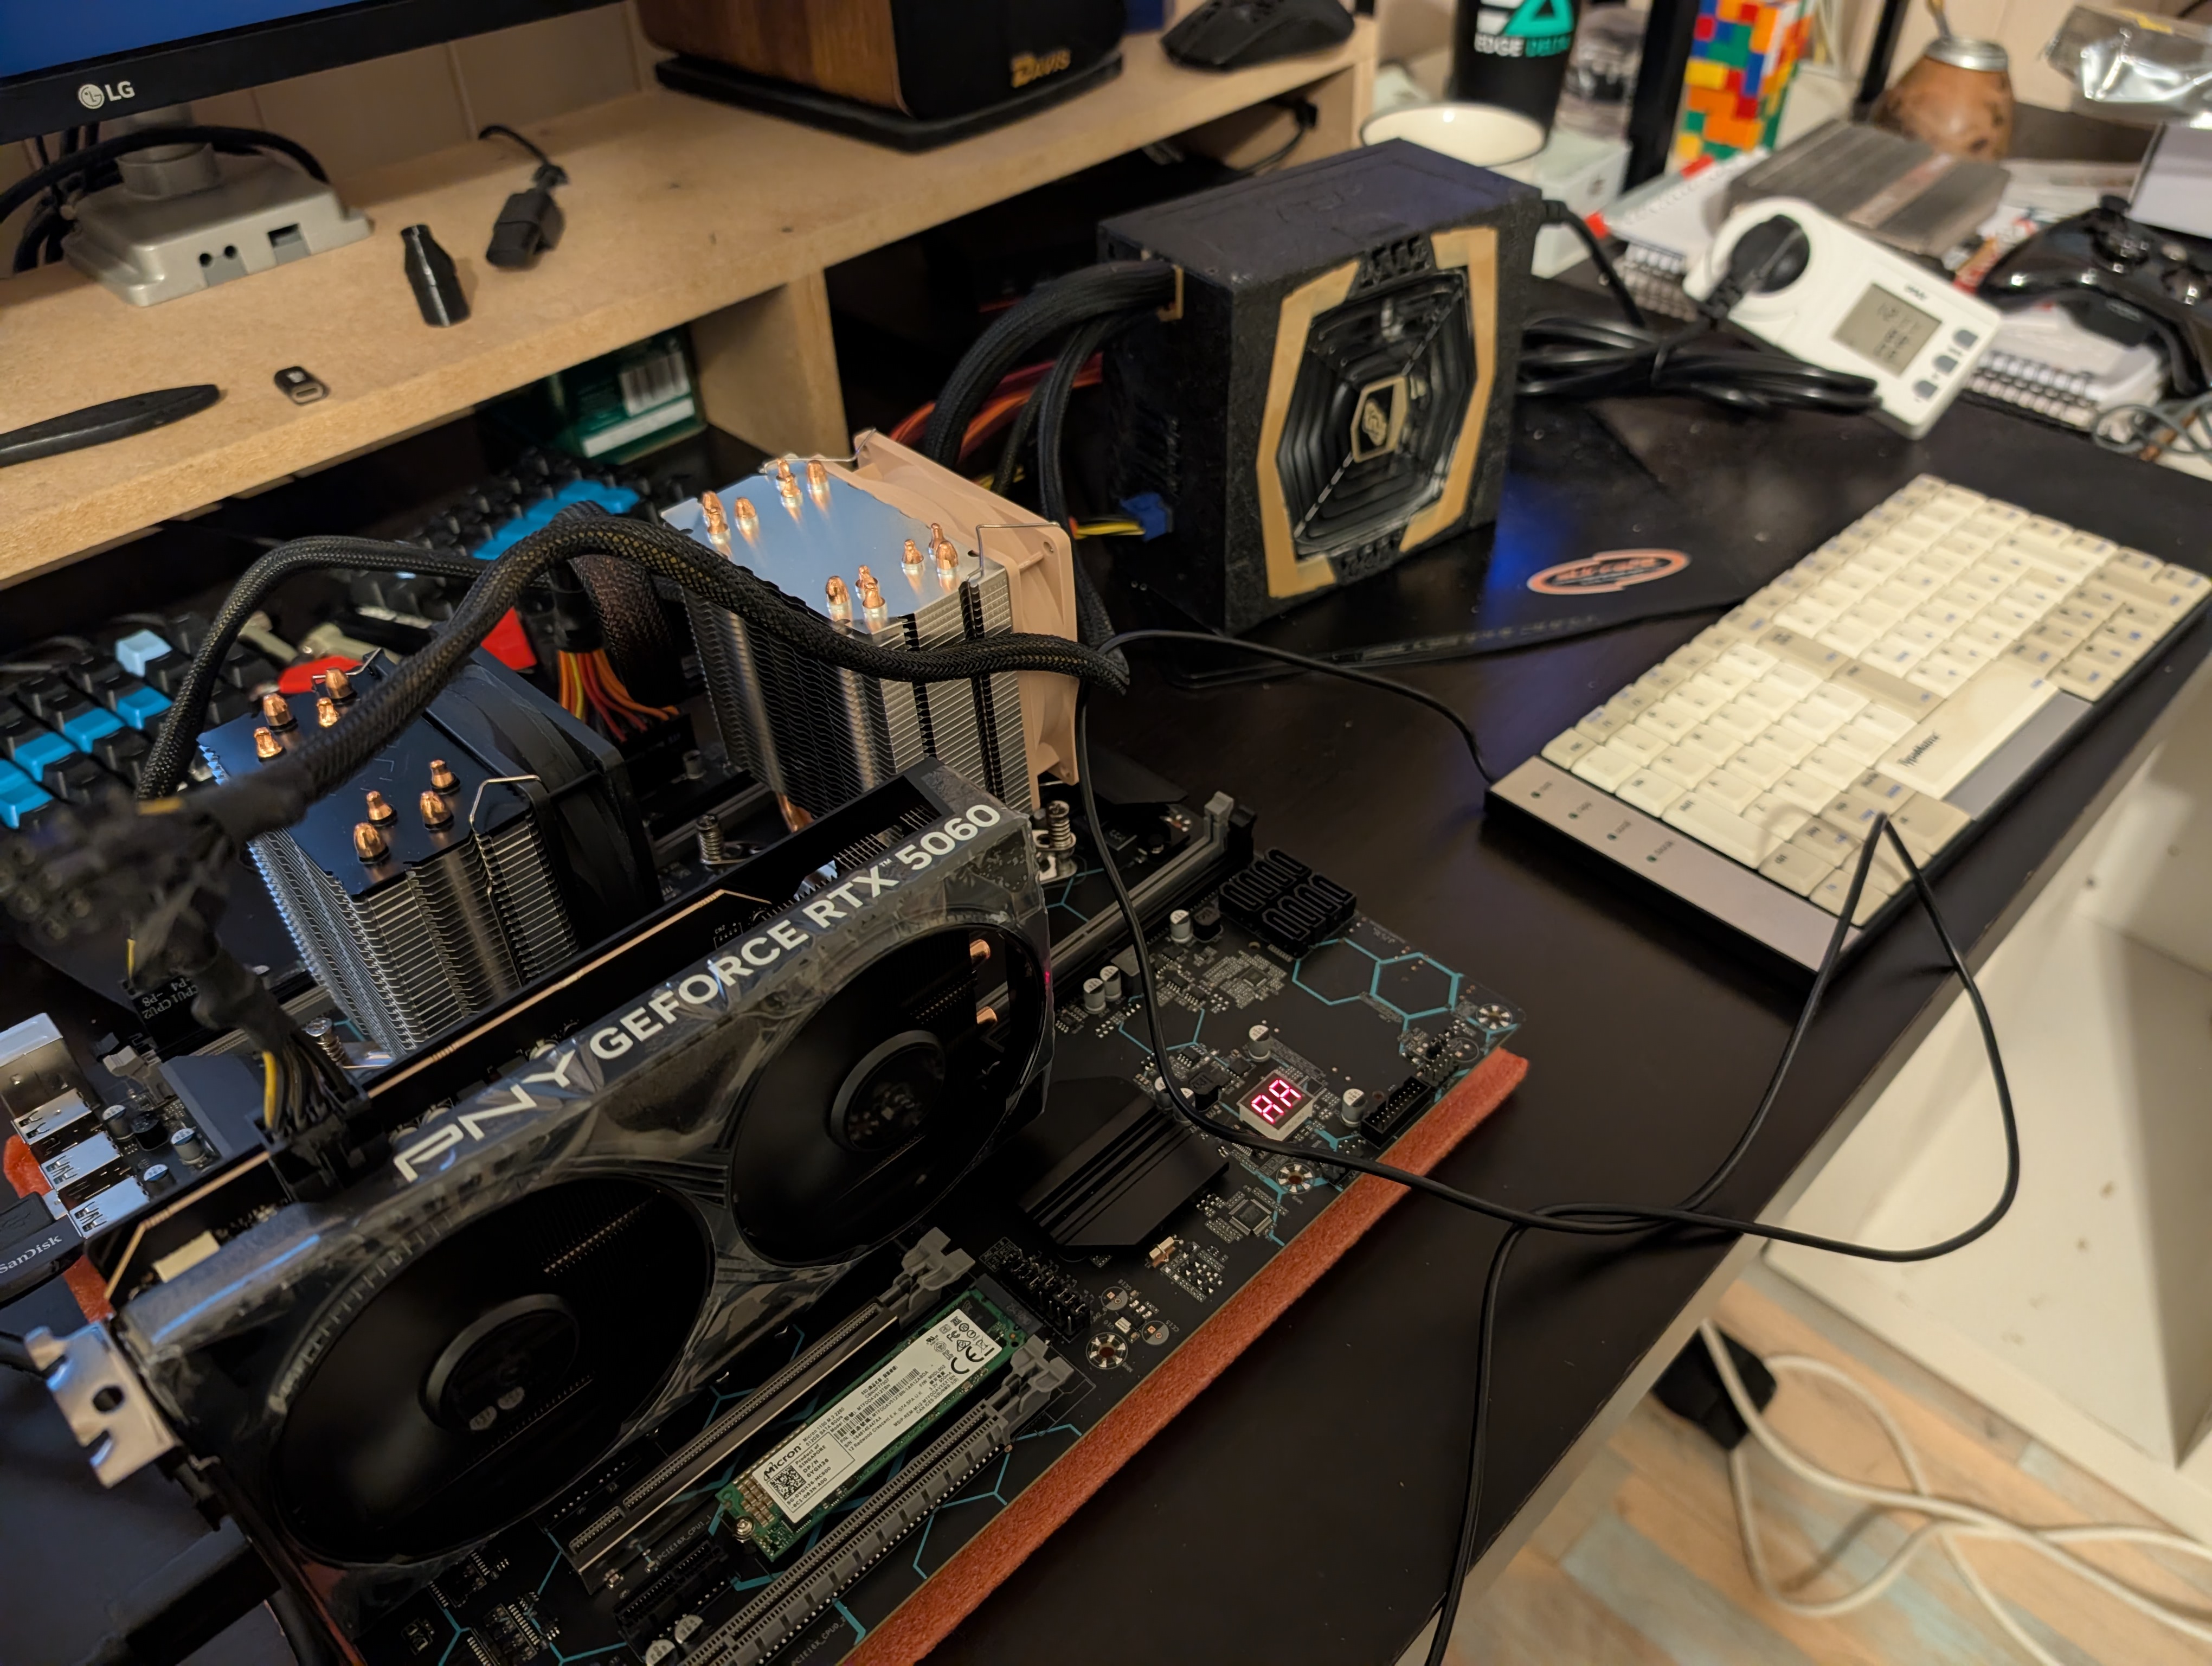
After I applied some trustworthy Artic Silver thermal grease, I installed the two heatsinks without a hitch.
It was about time to turn things on and see if everything would fire up correctly.
A thorough inspection on the motherboard shows:
- 1 x 24 PIN ATX connector
- 1 x 8 PIN CPU power connector
- 1 x 8 PIN CPU power connector: wait, there is a second one?
You can see it on the top right corner:
My modular Power Supply (PSU) only had 1 x 8 PIN CPU power connector. After a little bit of search through my cabling, I found an extension for a second one.
My little setup was starting to look like this:
I plugged everything, used a screwdriver to short the two pins on the motherboard to turn things up and, NOTHING.
I double check the connectors, everything. I tried to start things up again: NOTHING.
I was a bit tense, because I was a little bit unsure of the wiring of the second 8 PIN CPU power connector (it could have come from another modular PSU).
I removed the second 8 PIN CPU power connector and tried to start things up: hurray, the fans started spinning. Now, does it work?
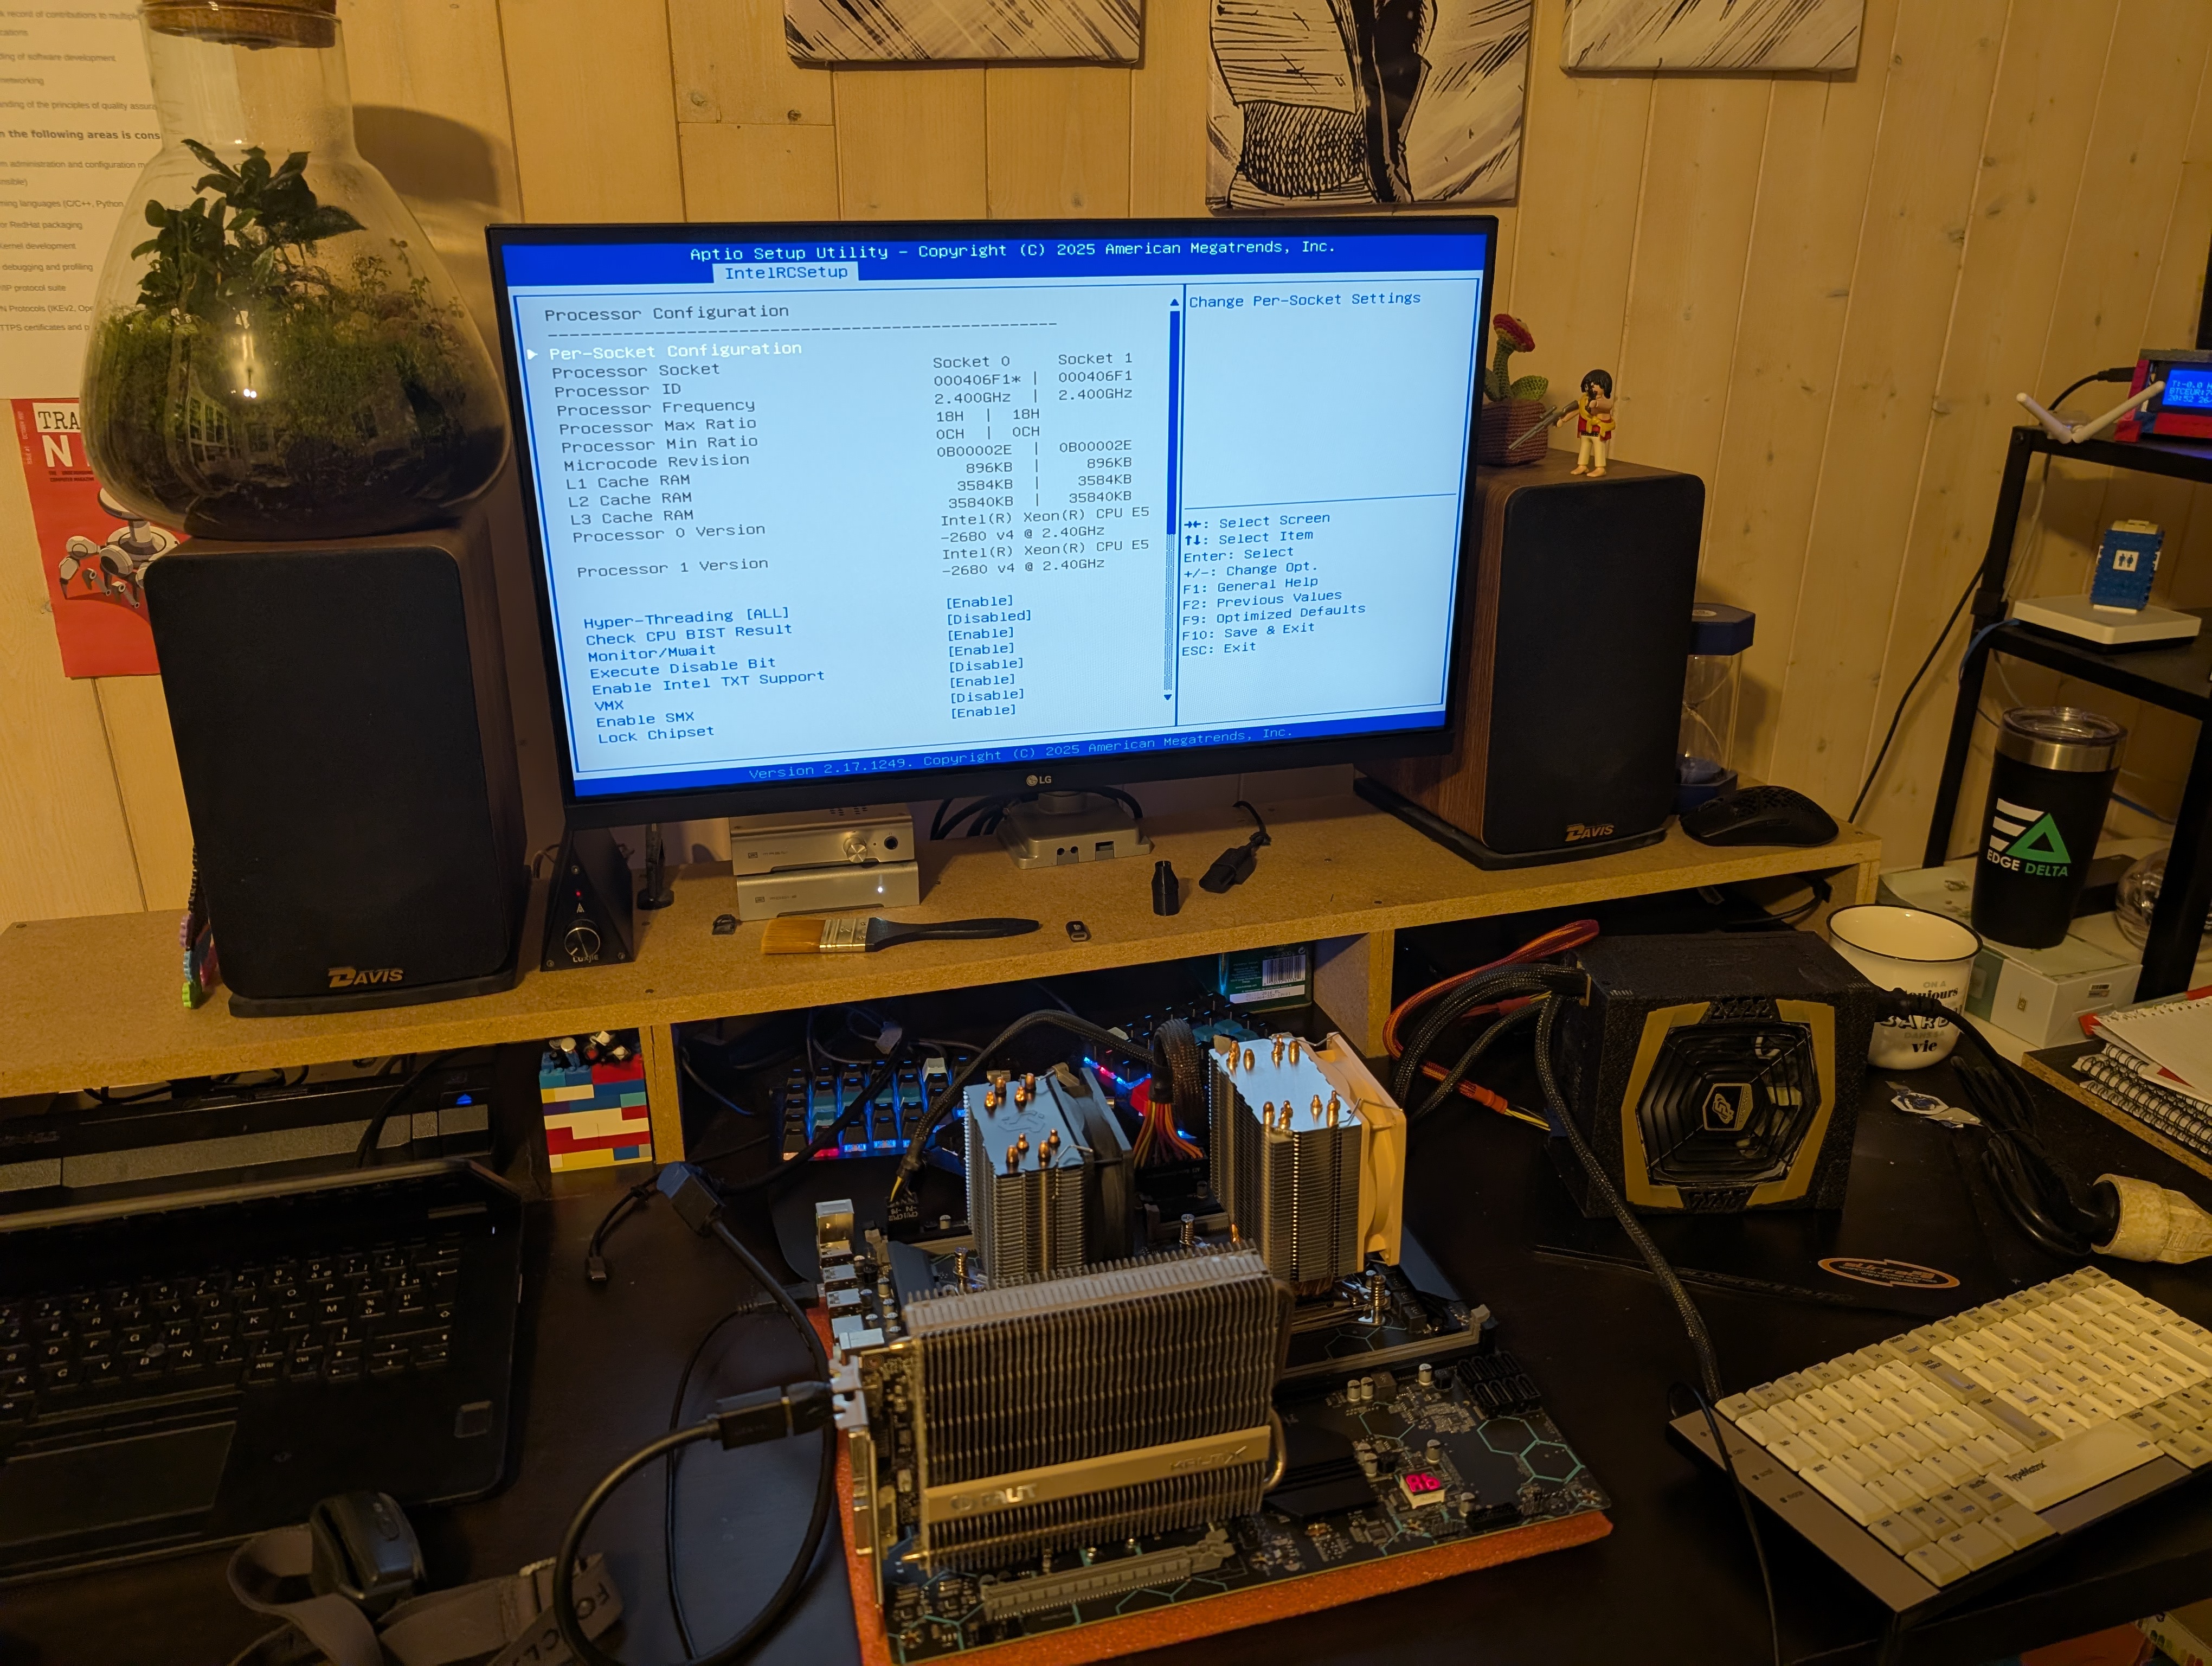
Turns out, there is a two segments LCD display on the motherboard that shows up error code and provide indication on the boot process.
Given how I proceded, I didn’t had a screen to check things up at first. For the first few boots, the error code would change on almost every reboot (I later on attributed this to some first boot process of the motherboard, where it checks the RAM speed, etc.). It then stabilized to the A6 error code.
The Miyconst Personal Blog website was where I started getting reliable information on the error code. A6 means “hard disk or graphics card error”. Is my graphic card incompatible with the board? Well, maybe it’s time I plug a screen.
It turned out: it’s just that I didn’t inserted any storage device, so the motherboard would be unable to boot any OS.
I could however access the BIOS, as shown in this pic of this first (very emotionaly charged) boot:
Back to the second 8 PIN CPU connector: I don’t know why it’s populated on the motherboard. The motherboard manual doesn’t indicate anything about it. I noticed that the system boots regardless on the 8 PIN connector I use on the motherboard.
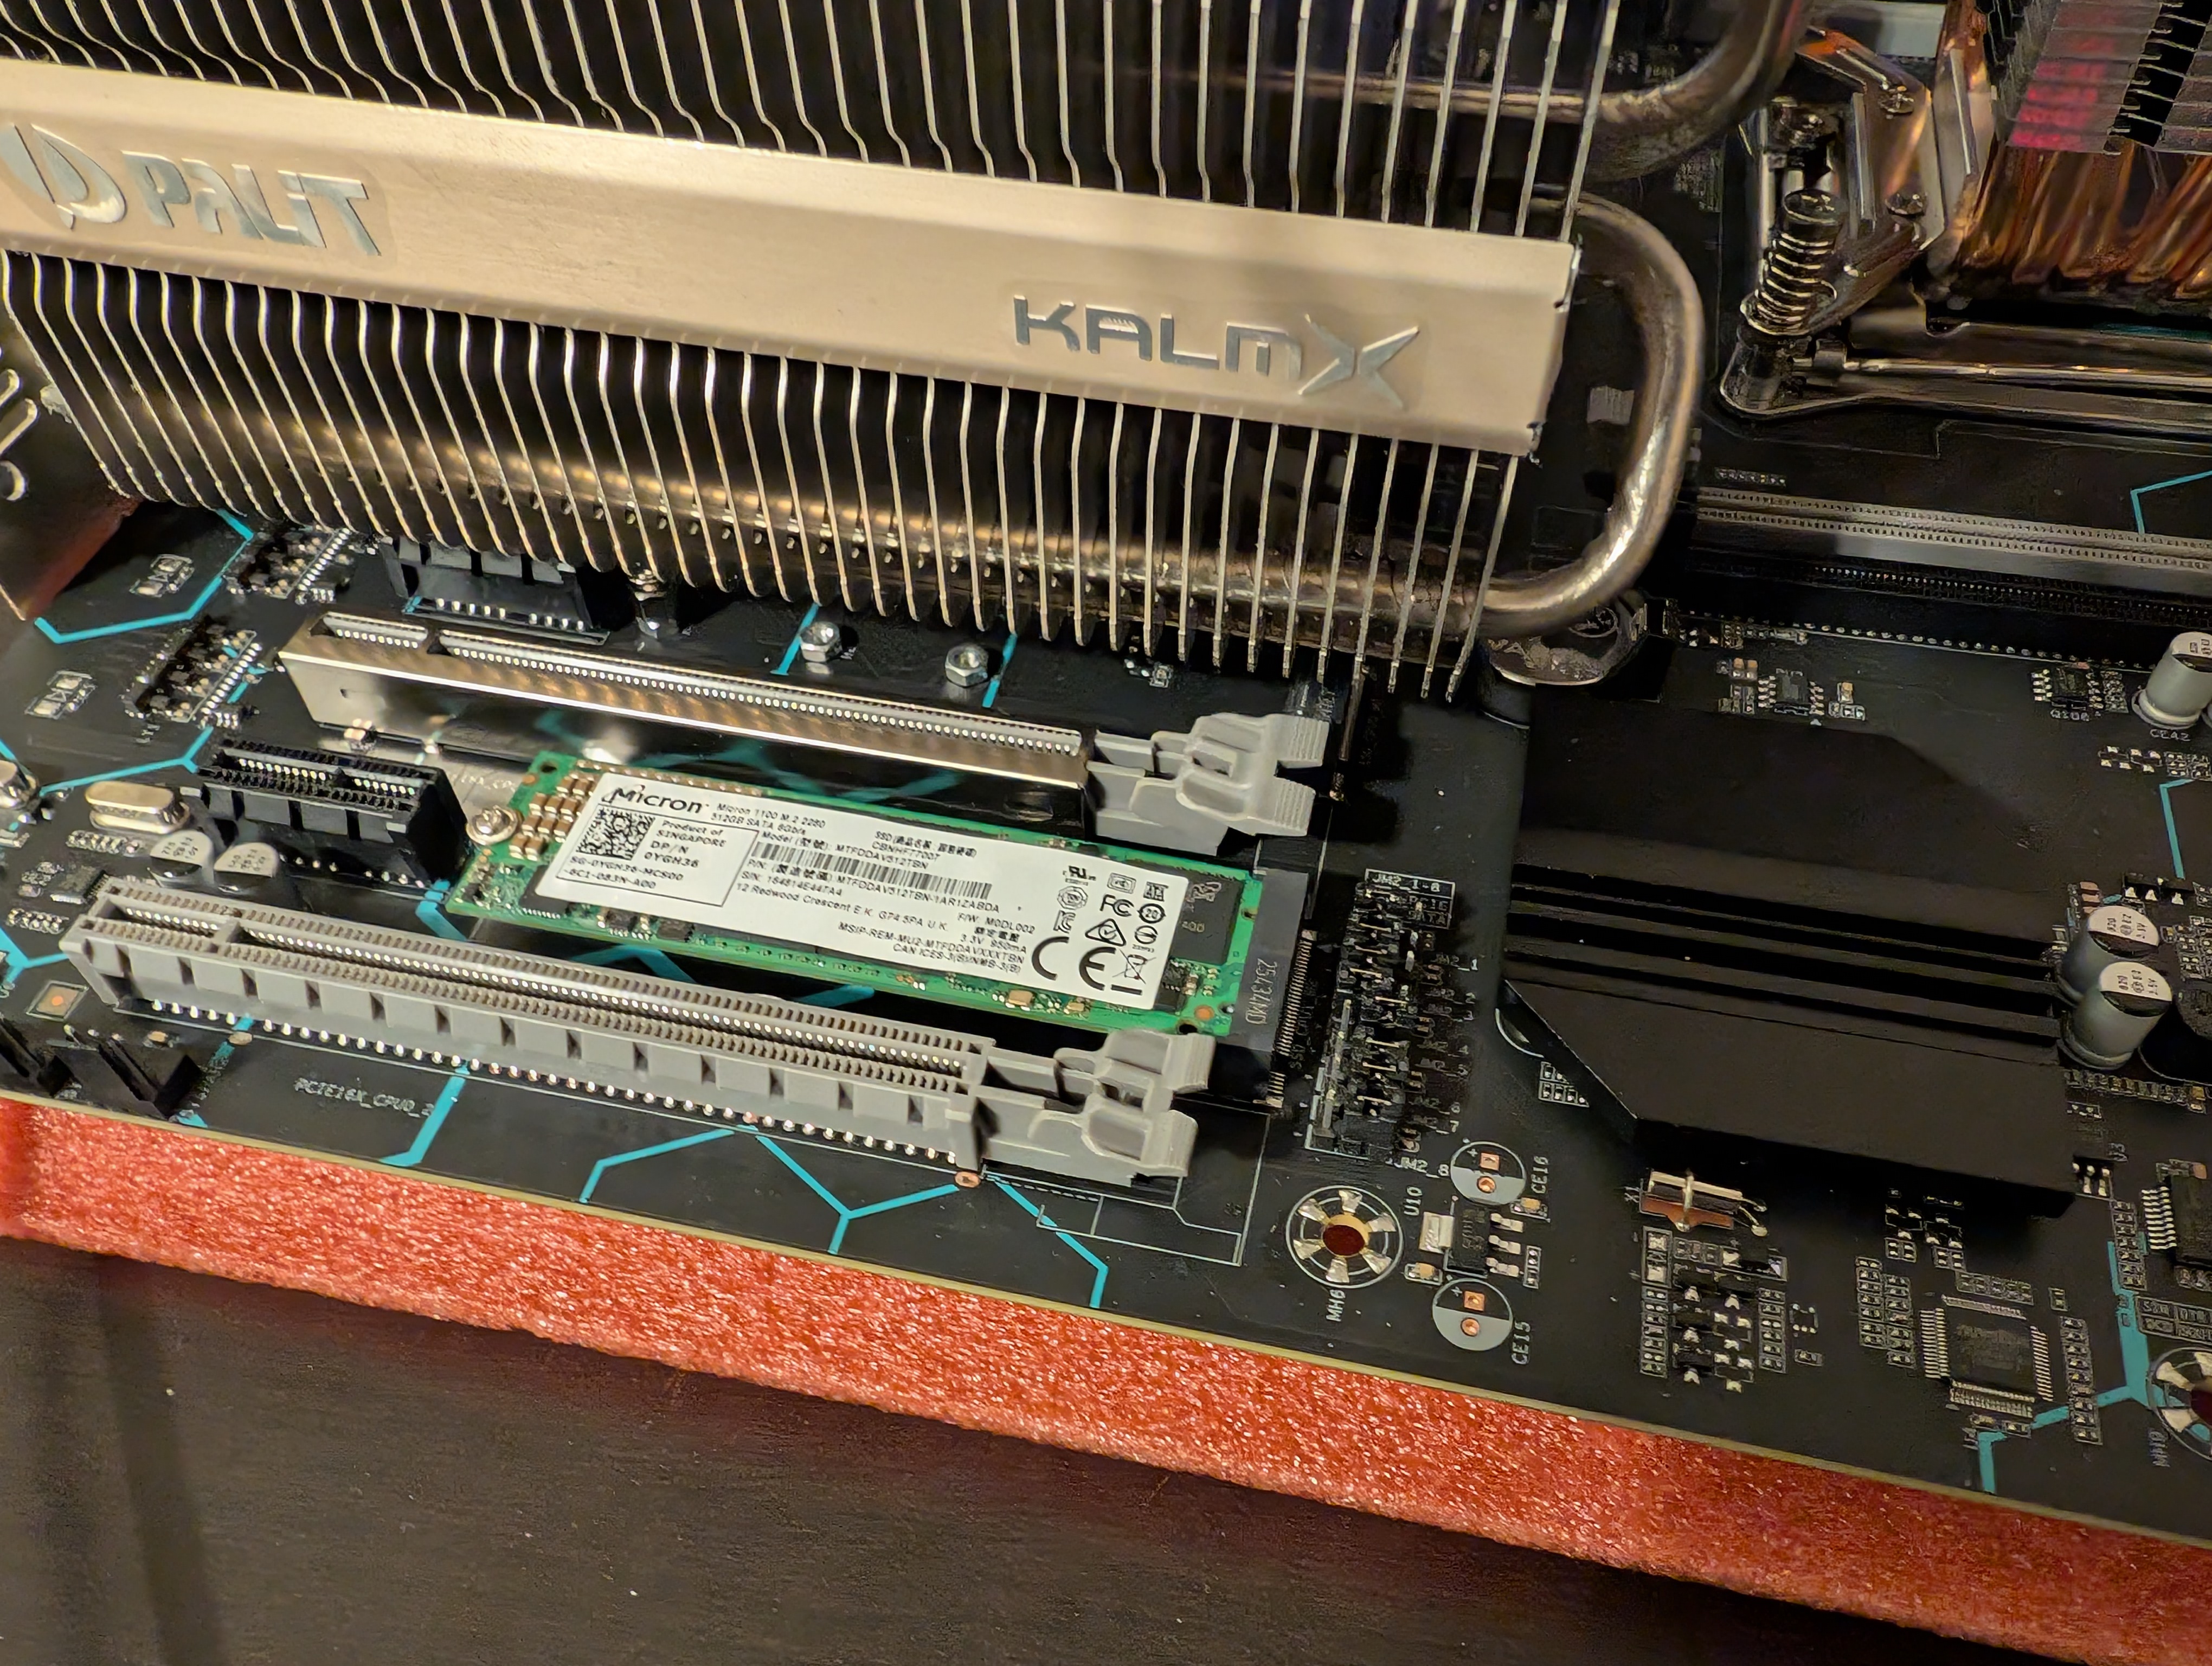
I installed a spare NVME drive that I had, and after a little bit of search, I set the jumpers to SATA mode and it was recognized.
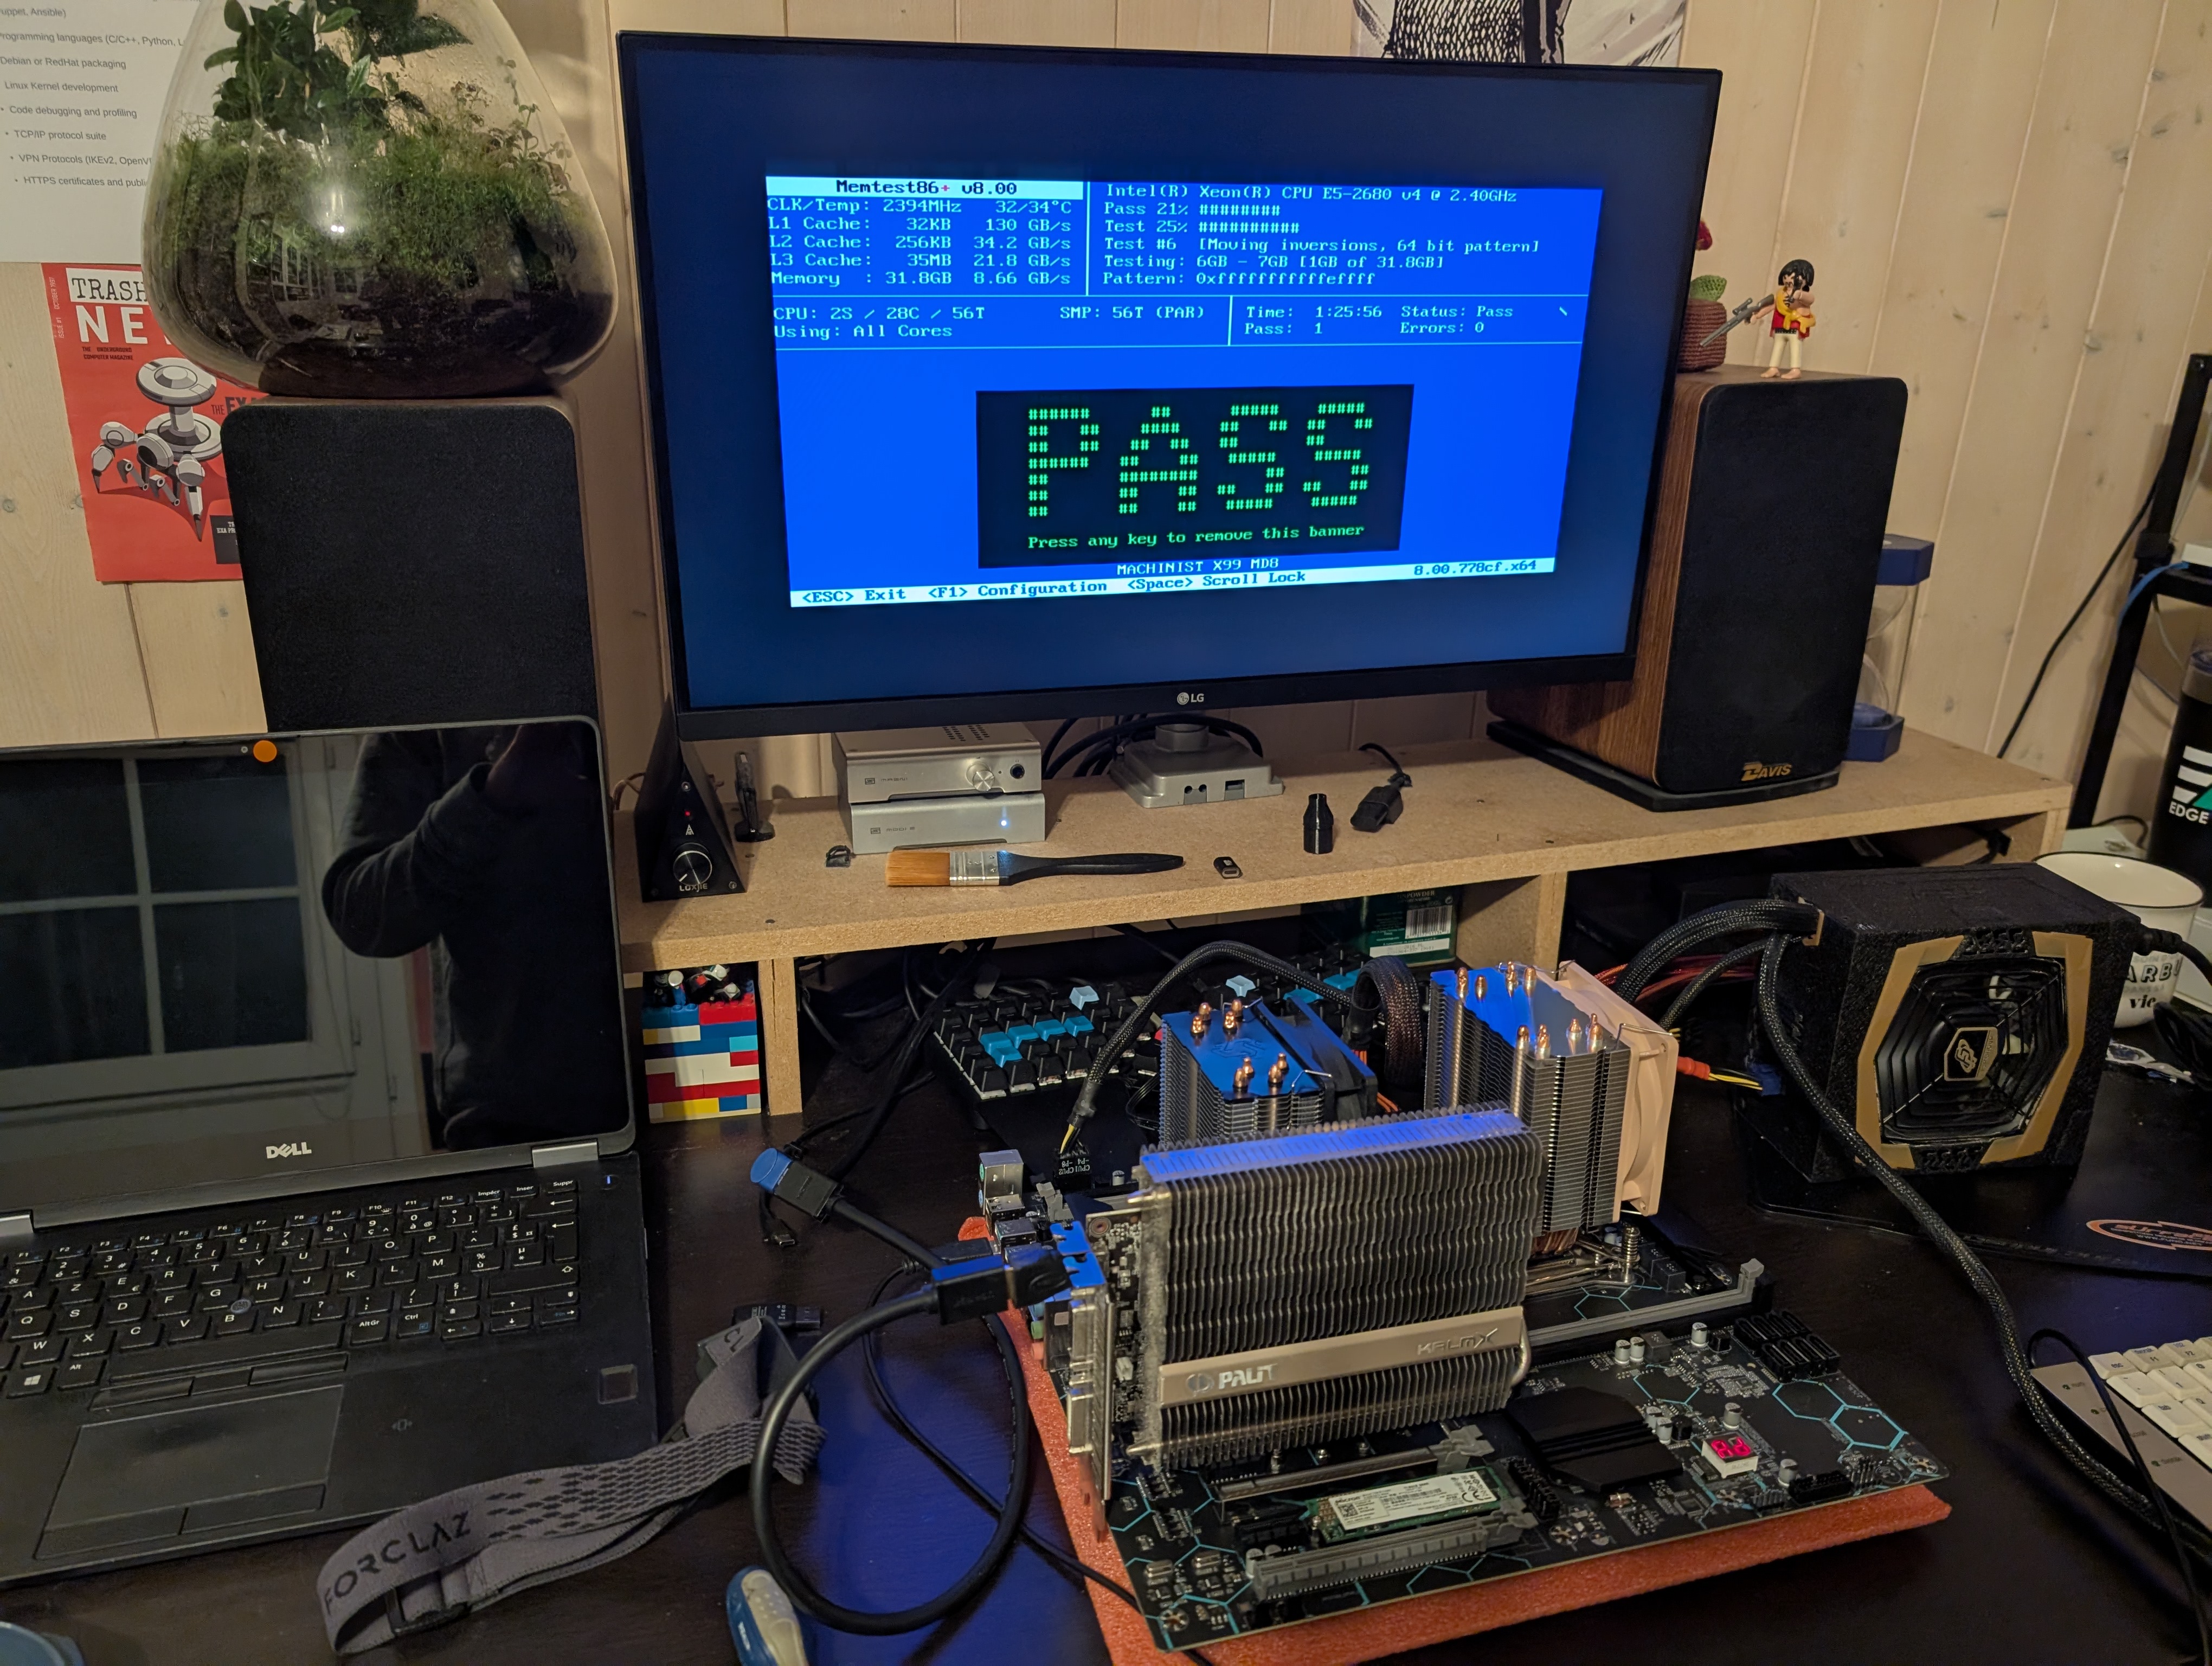
Testing the RAM
Testing the RAM on a new system always proved to be a easy time saver: bad RAM often leads to corruption, system crash, etc. Memtest86+ makes it so easy.
After an hour, the verdict came: the used RAM modules are good!
Moving from my desktop to the new case
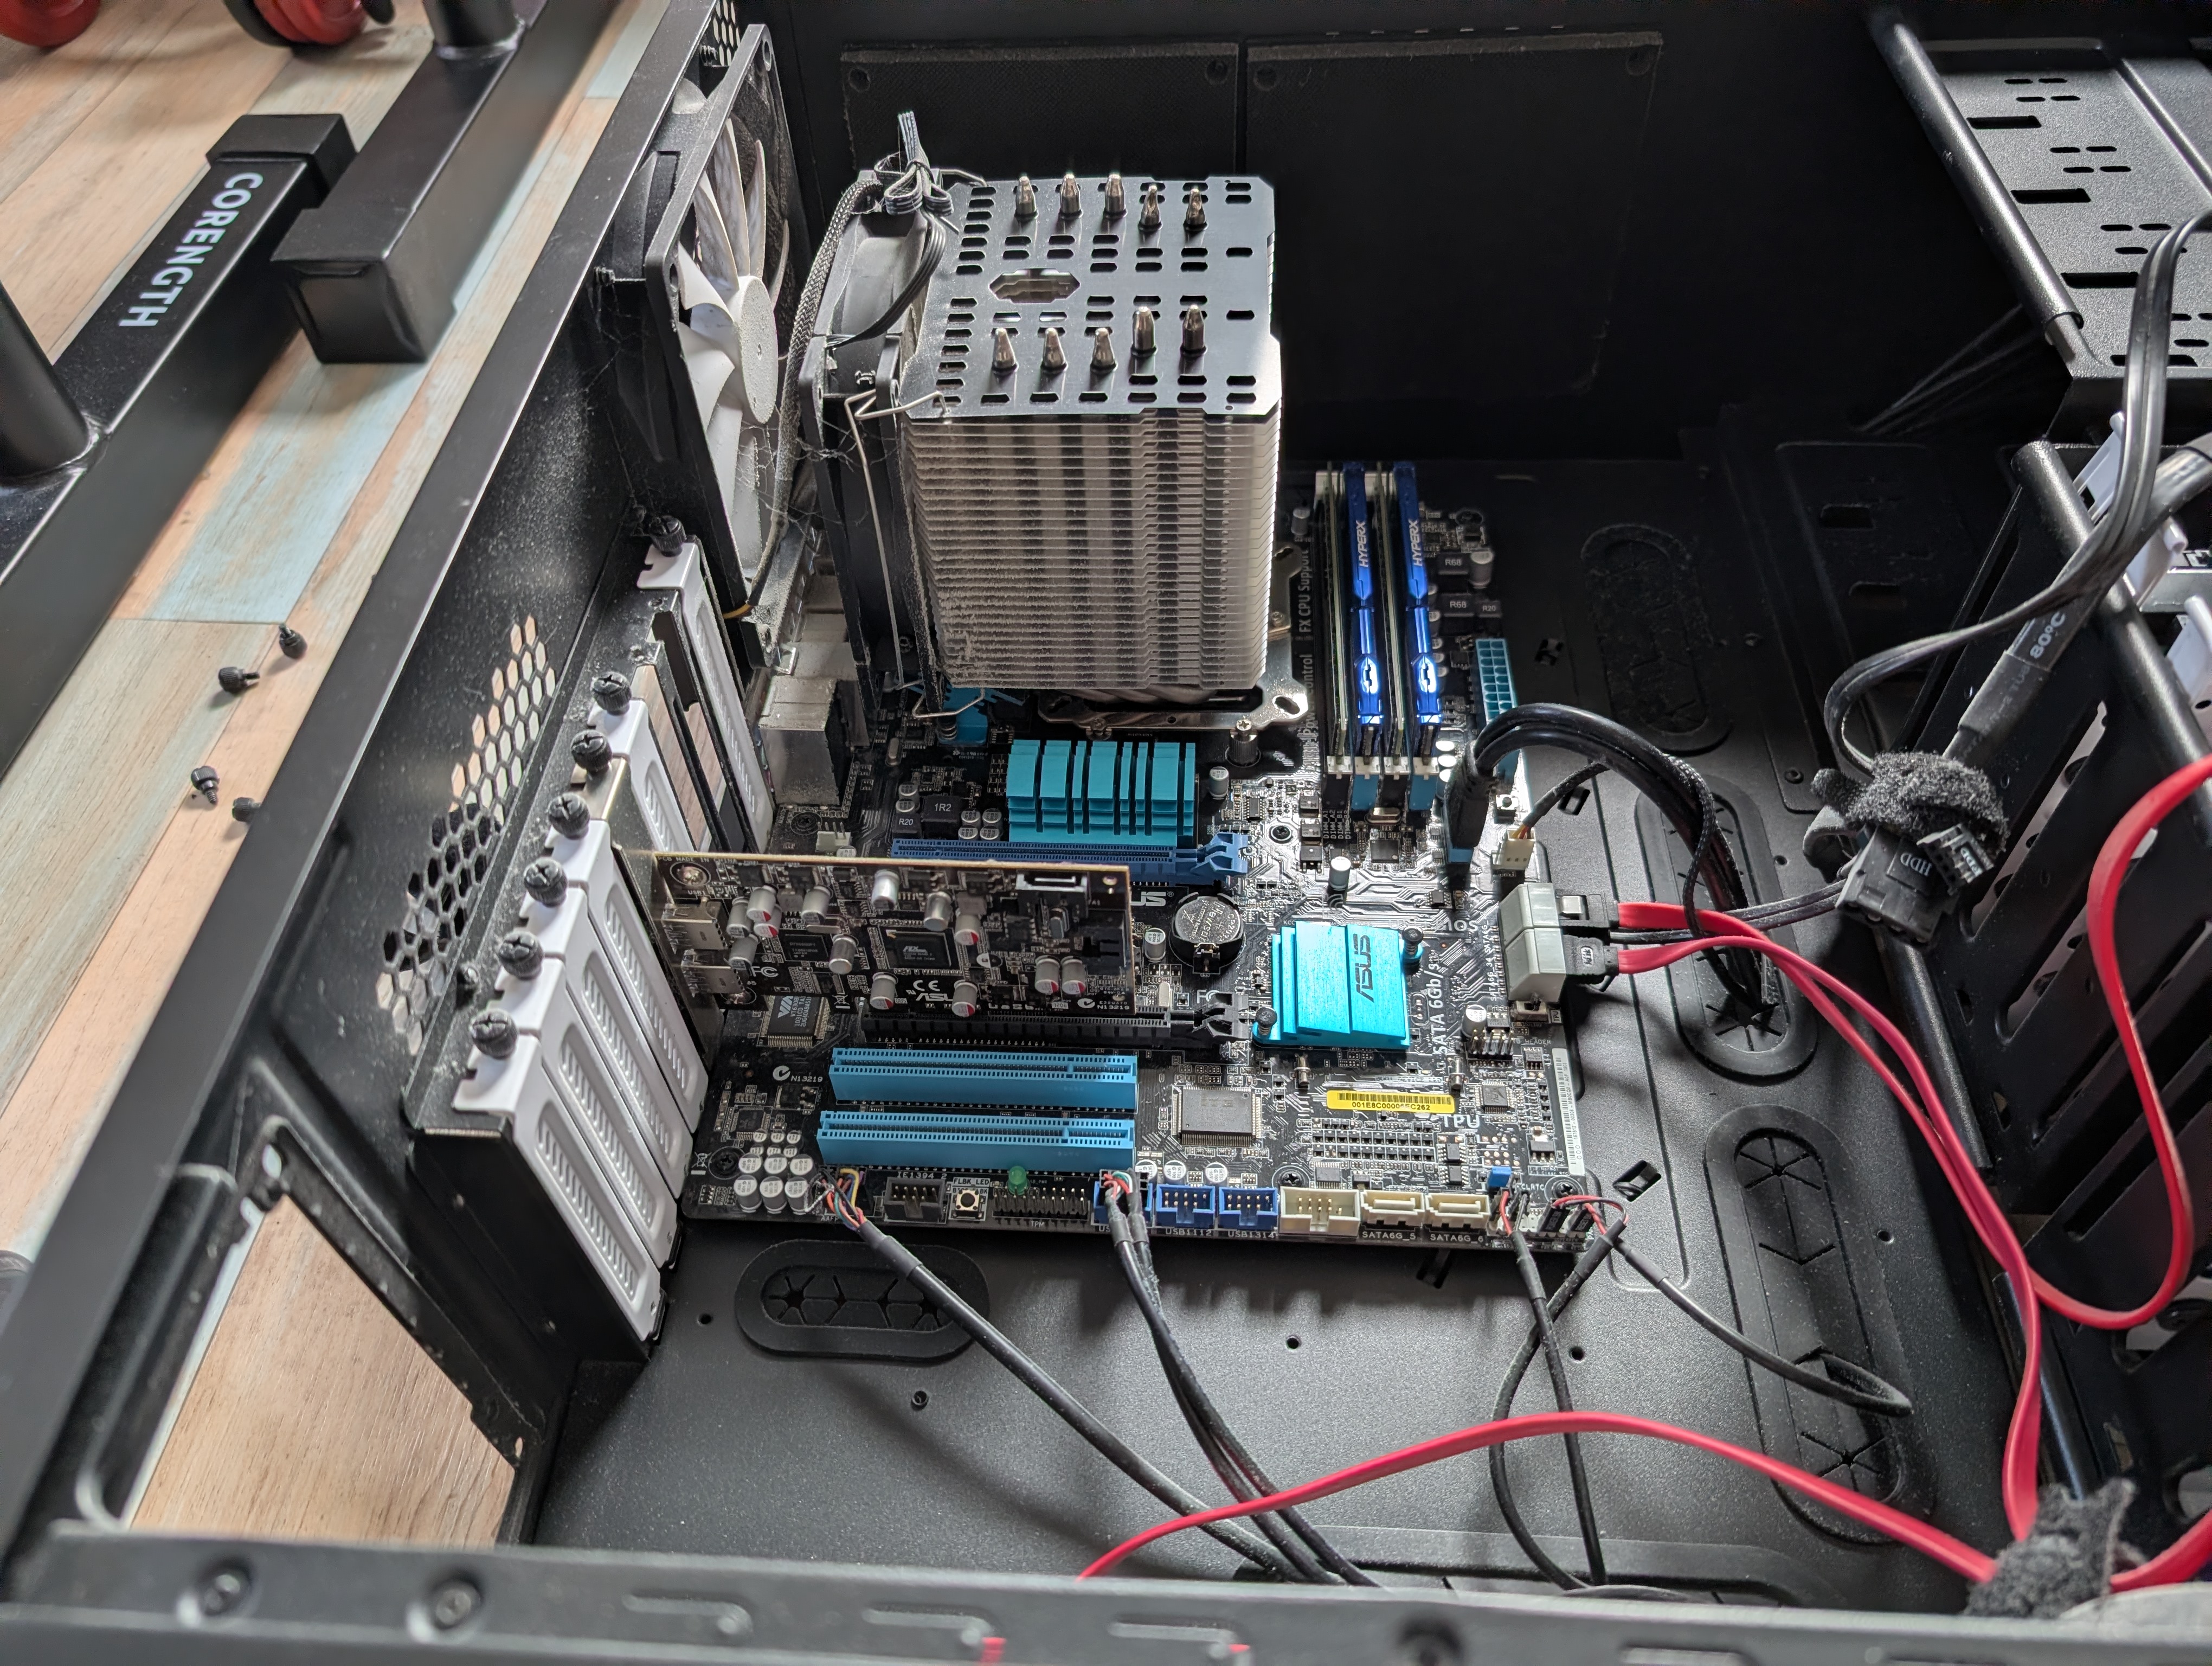
I removed my old motherboard:
And installed it in a new case:
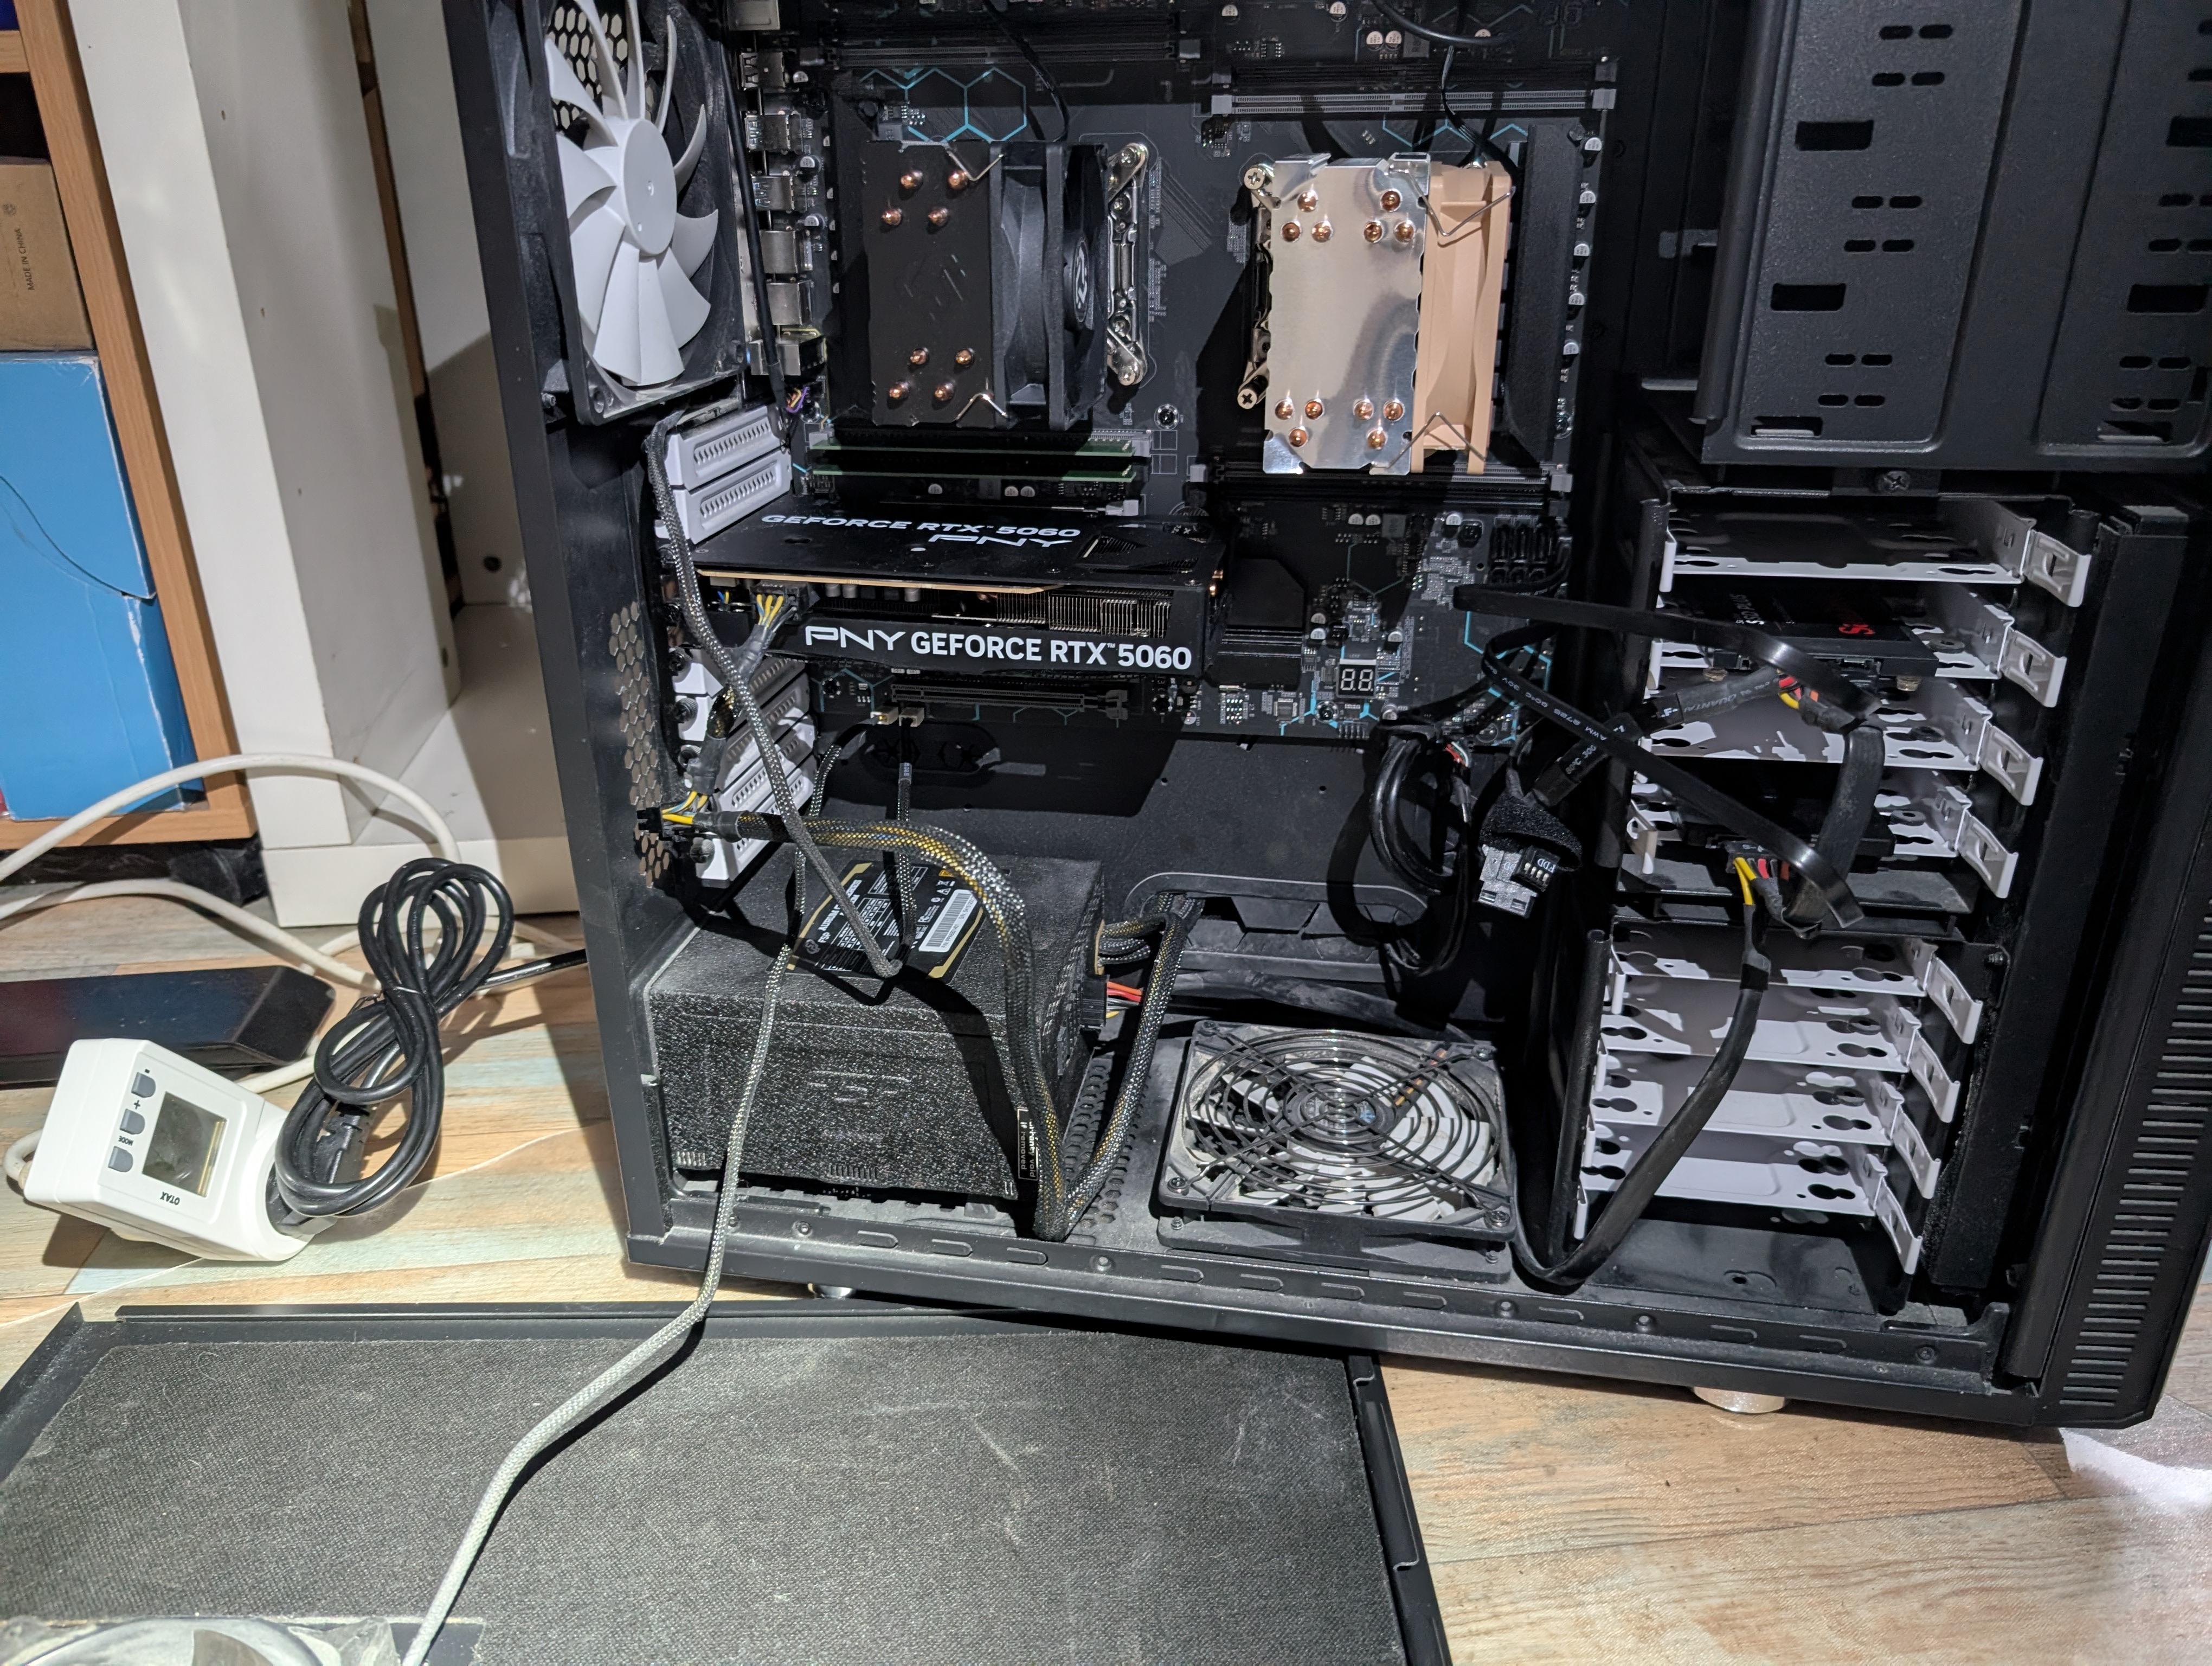
What you don’t see from the picture:
- the cabling move through the back of the case: I’m perhaps 1cm short of not being able to power up the board
- the new (Aliexpress) heatsink are clearly shrunk from my massive previous heatsink and yet, the CPUs are around 30°C most of the time
- I wasn’t expecting the new motherboard to be so massive: I’m glad the Fractal XL R2 is not exactly small
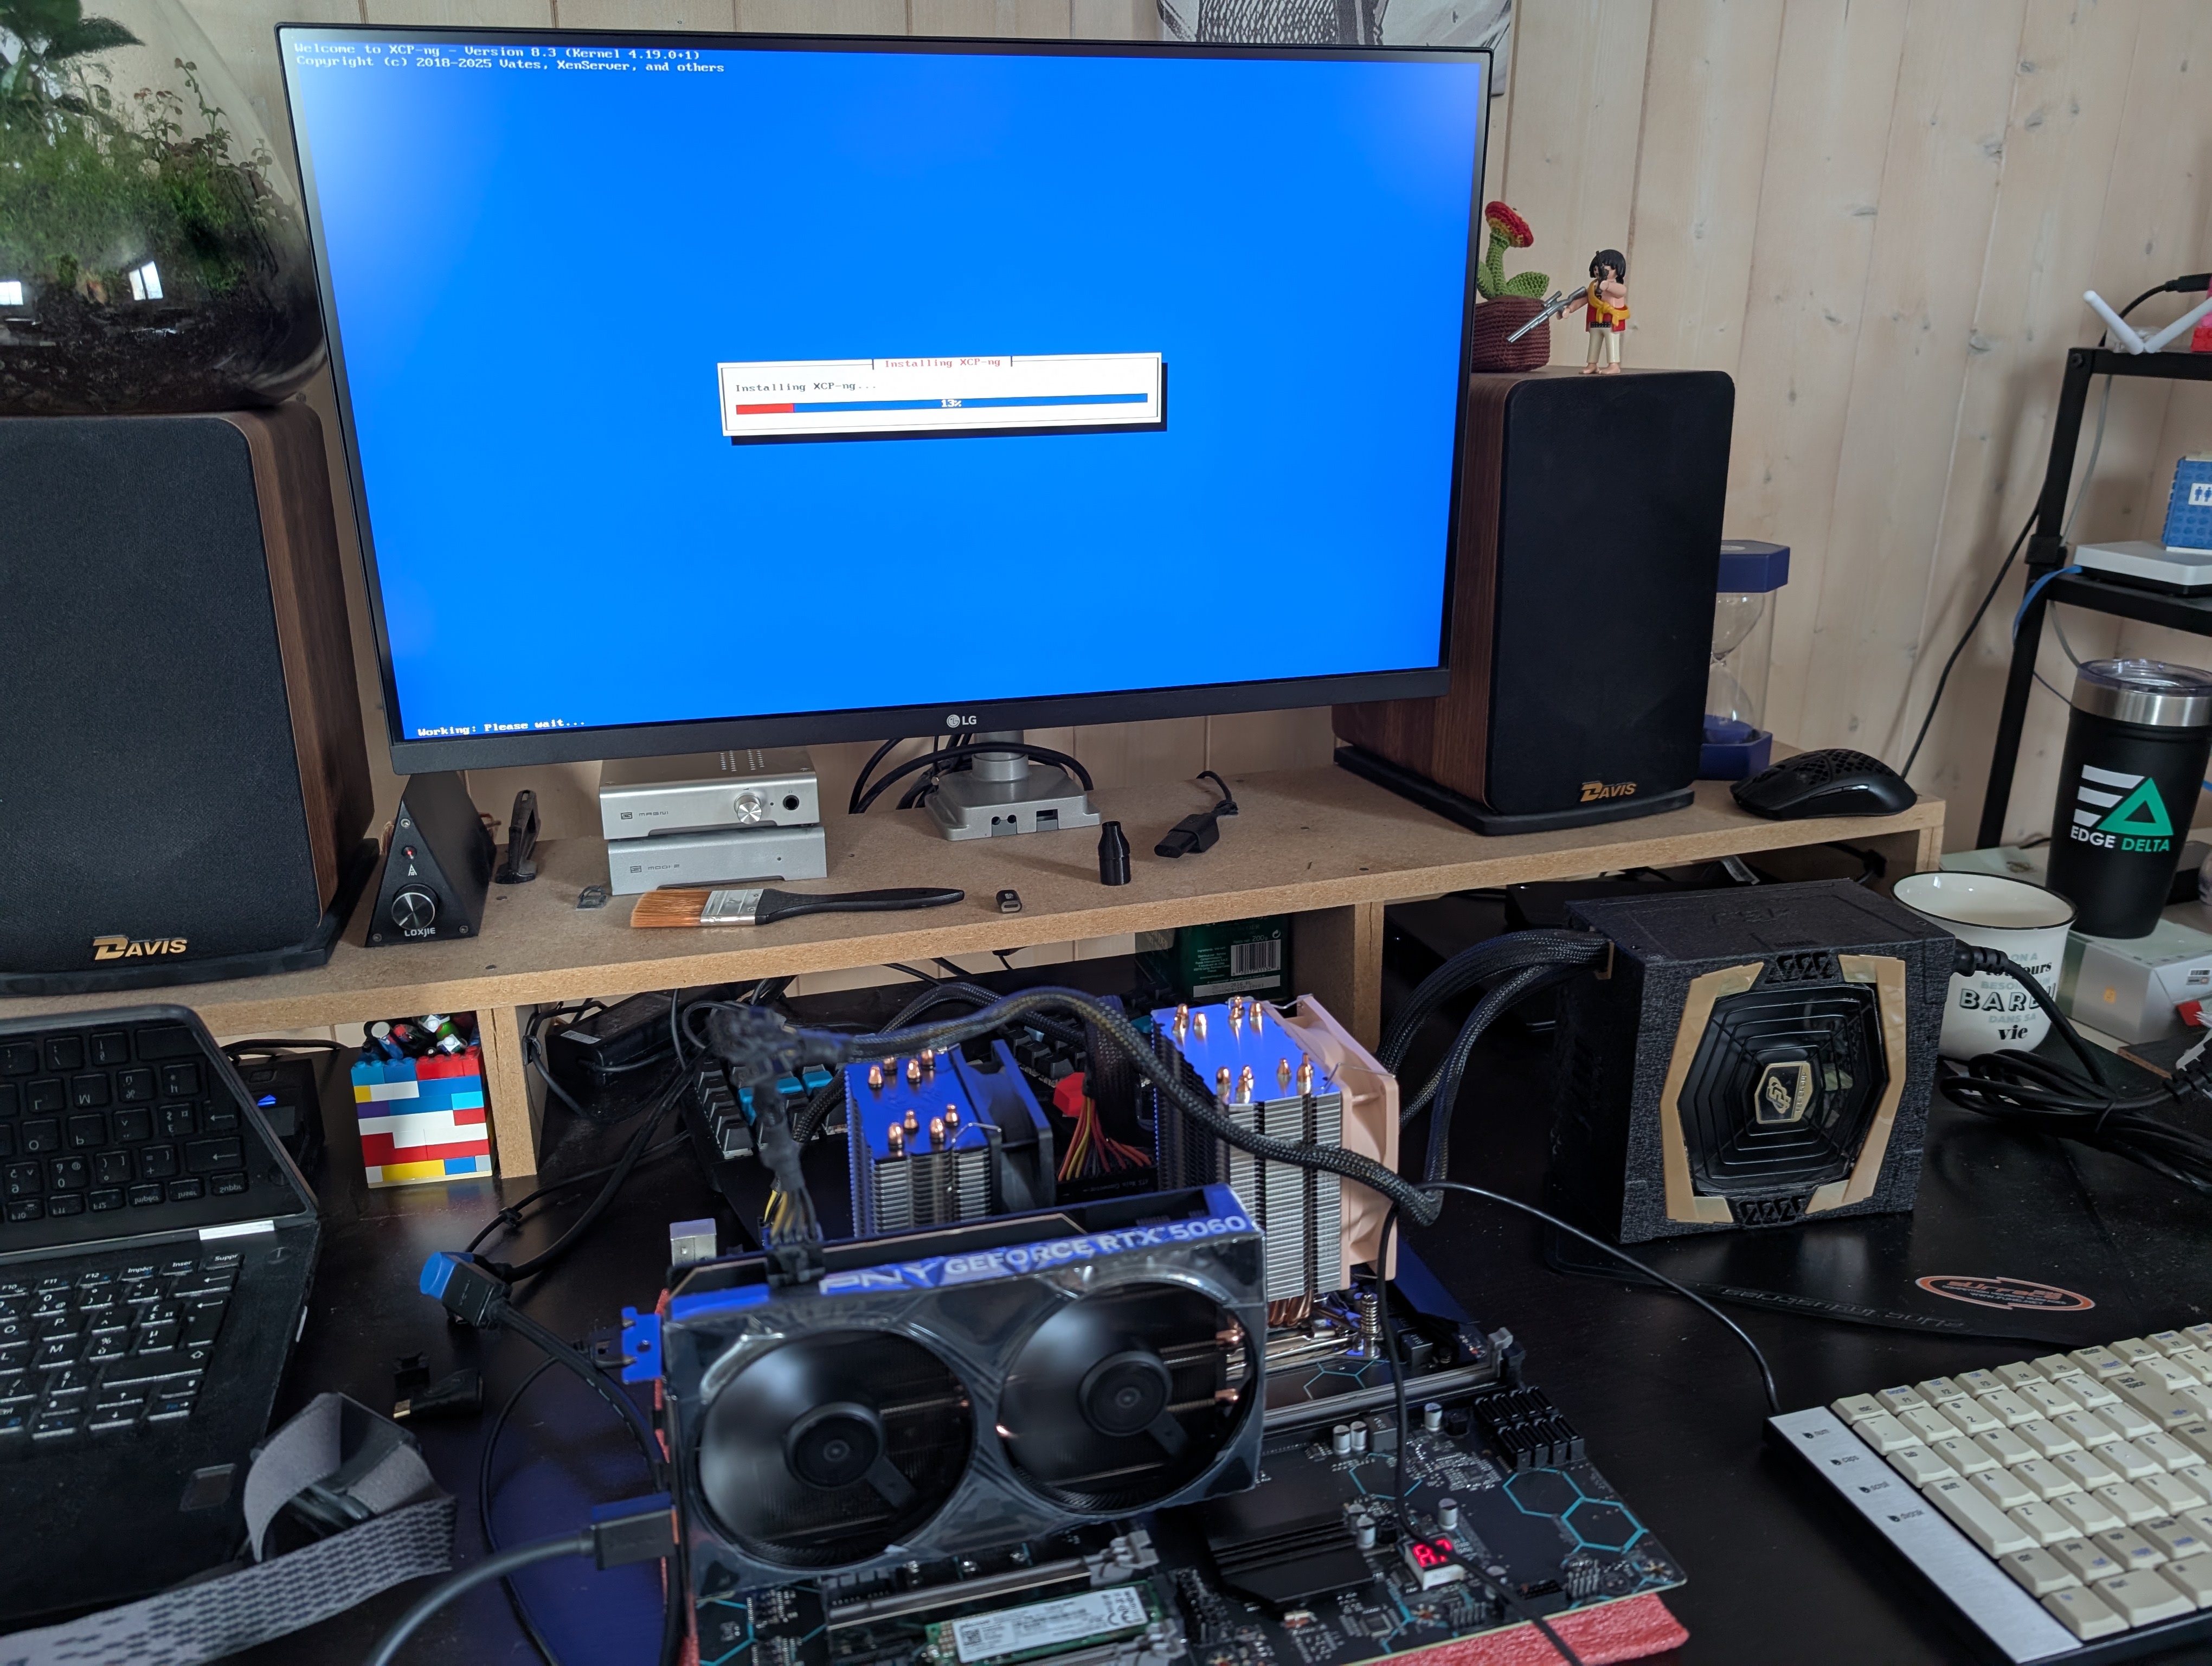
Installing the OS: XCP-NG
At that step I was already quite happy, the system seemed stable and I was begining to build trust.
I wanted to learn something new. My previous build was based on Proxmox. It was a bit finicky at first, but it turned out to be quite stable on the long run. This time, I set out to install XCP-NG .
This setup was to be different:
- hypervisor: using Proxmox instead of XCP-NG
- VM OS: using Linux instead of Windows, I set out to test CachyOS and Bazzite
- I was growing tired of having the little nagging text on the bottom right inviting me to buy a license
- the Internet now says gaming is better on Linux than on Windows
- PCI passthrough of the graphic card (like before, with a newer graphic card though)
Installing XCP-NG is quite easy. By itself, it doesn’t do much after first boot. It comes with a web interface (XO Lite) that invites to install Xen Orchestra. After installing Xen Orchestra, VM creation becomes a little bit easier through the UI.
On the hypervisor OS, I created a little ISO repository to quickly install a few OS:
xe sr-create name-label ="ISO Repository" type=iso device-config:location=/opt/xensource/packages/iso device-config:legacy_mode=true content-type=iso
I could then wget images in that directory.
Failed attempt at turning XCP-NG in a Gaming platform
I spent quite some time trying to get things working.
Here is what went wrong at first:
- I was unable to see the graphic card on the PCI bus
- lspci was not displaying the card
- I thought it to be related to the old Linux kernel provided with XCP-NG
Bear in mind that I remotely connect to this headless computer. Had it been different, I would I saved some time. It turned out that the graphic card was not fully inserted when I moved the motherboard from my desk to the Tower computer case. This was a bit surprising that the system would boot and perform correctly.
Here is what went well after inserting the graphic card :
- installing CachyOS through the Xen Orchestra interface
- installing Bazzite through the Xen Orchestra interface
- detaching the PCI graphic card from the hypervisor OS and providing it to a VM
At that stage, 2 things went wrong and a third was a deal-breaker:
- wrong: cachyOS would be extremely slow on games because it would pick by default the emulated Cirrus VGA graphic card provided by XCP-NG (even when I disabled it with the Xen Orchestra interface)
- nvidia proprietary drive was installed, but the GLX driver would default llvm-pipeline, same for the vulkan driver
- I spent quite some time here, changing environment variable, that would work for glxgears/glxinfo, but then it wouldn’t in Steam
- wrong: Bazzite was in Steam Big Picture mode and had some extreme graphic corruption with a lot of blinking happening (to the point of being unusable)
- deal-breaker: USB passthrough in XCP-NG is not persistant and can’t be done an a running VM.
- It can be somewhat understood from this two sources:
- that means you can’t auto-start your gaming VM and expect it to have your wireless gamepad controller attached
Giving up and installing CachyOS on baremetal
Thinking a little bit back, this new build would serve two purposes:
- gaming: the thing I’ve been explaining in this blog post
- homelab: the part I omitted from this blog post
Although I want to do both, I don’t need to do both use cases simultaneously. So I can do something wonderful: dual booting.
Thus, let’s install CachyOS directly on the baremetal.
After a few easy steps, everything works as intended:
- added a userspace systemd unit to start sunshine when my user session is opening
- modifying Cosmic Greetd (the login greeter) so it would auto login into my user session
I can now press the power button, wait a minute, fire up moonlight, and start playing directly. The system is quite snappy.
Can it actually play games?
Oh yes, it does.
See the attached picture of the Cyberpunk 2077 benchmark.
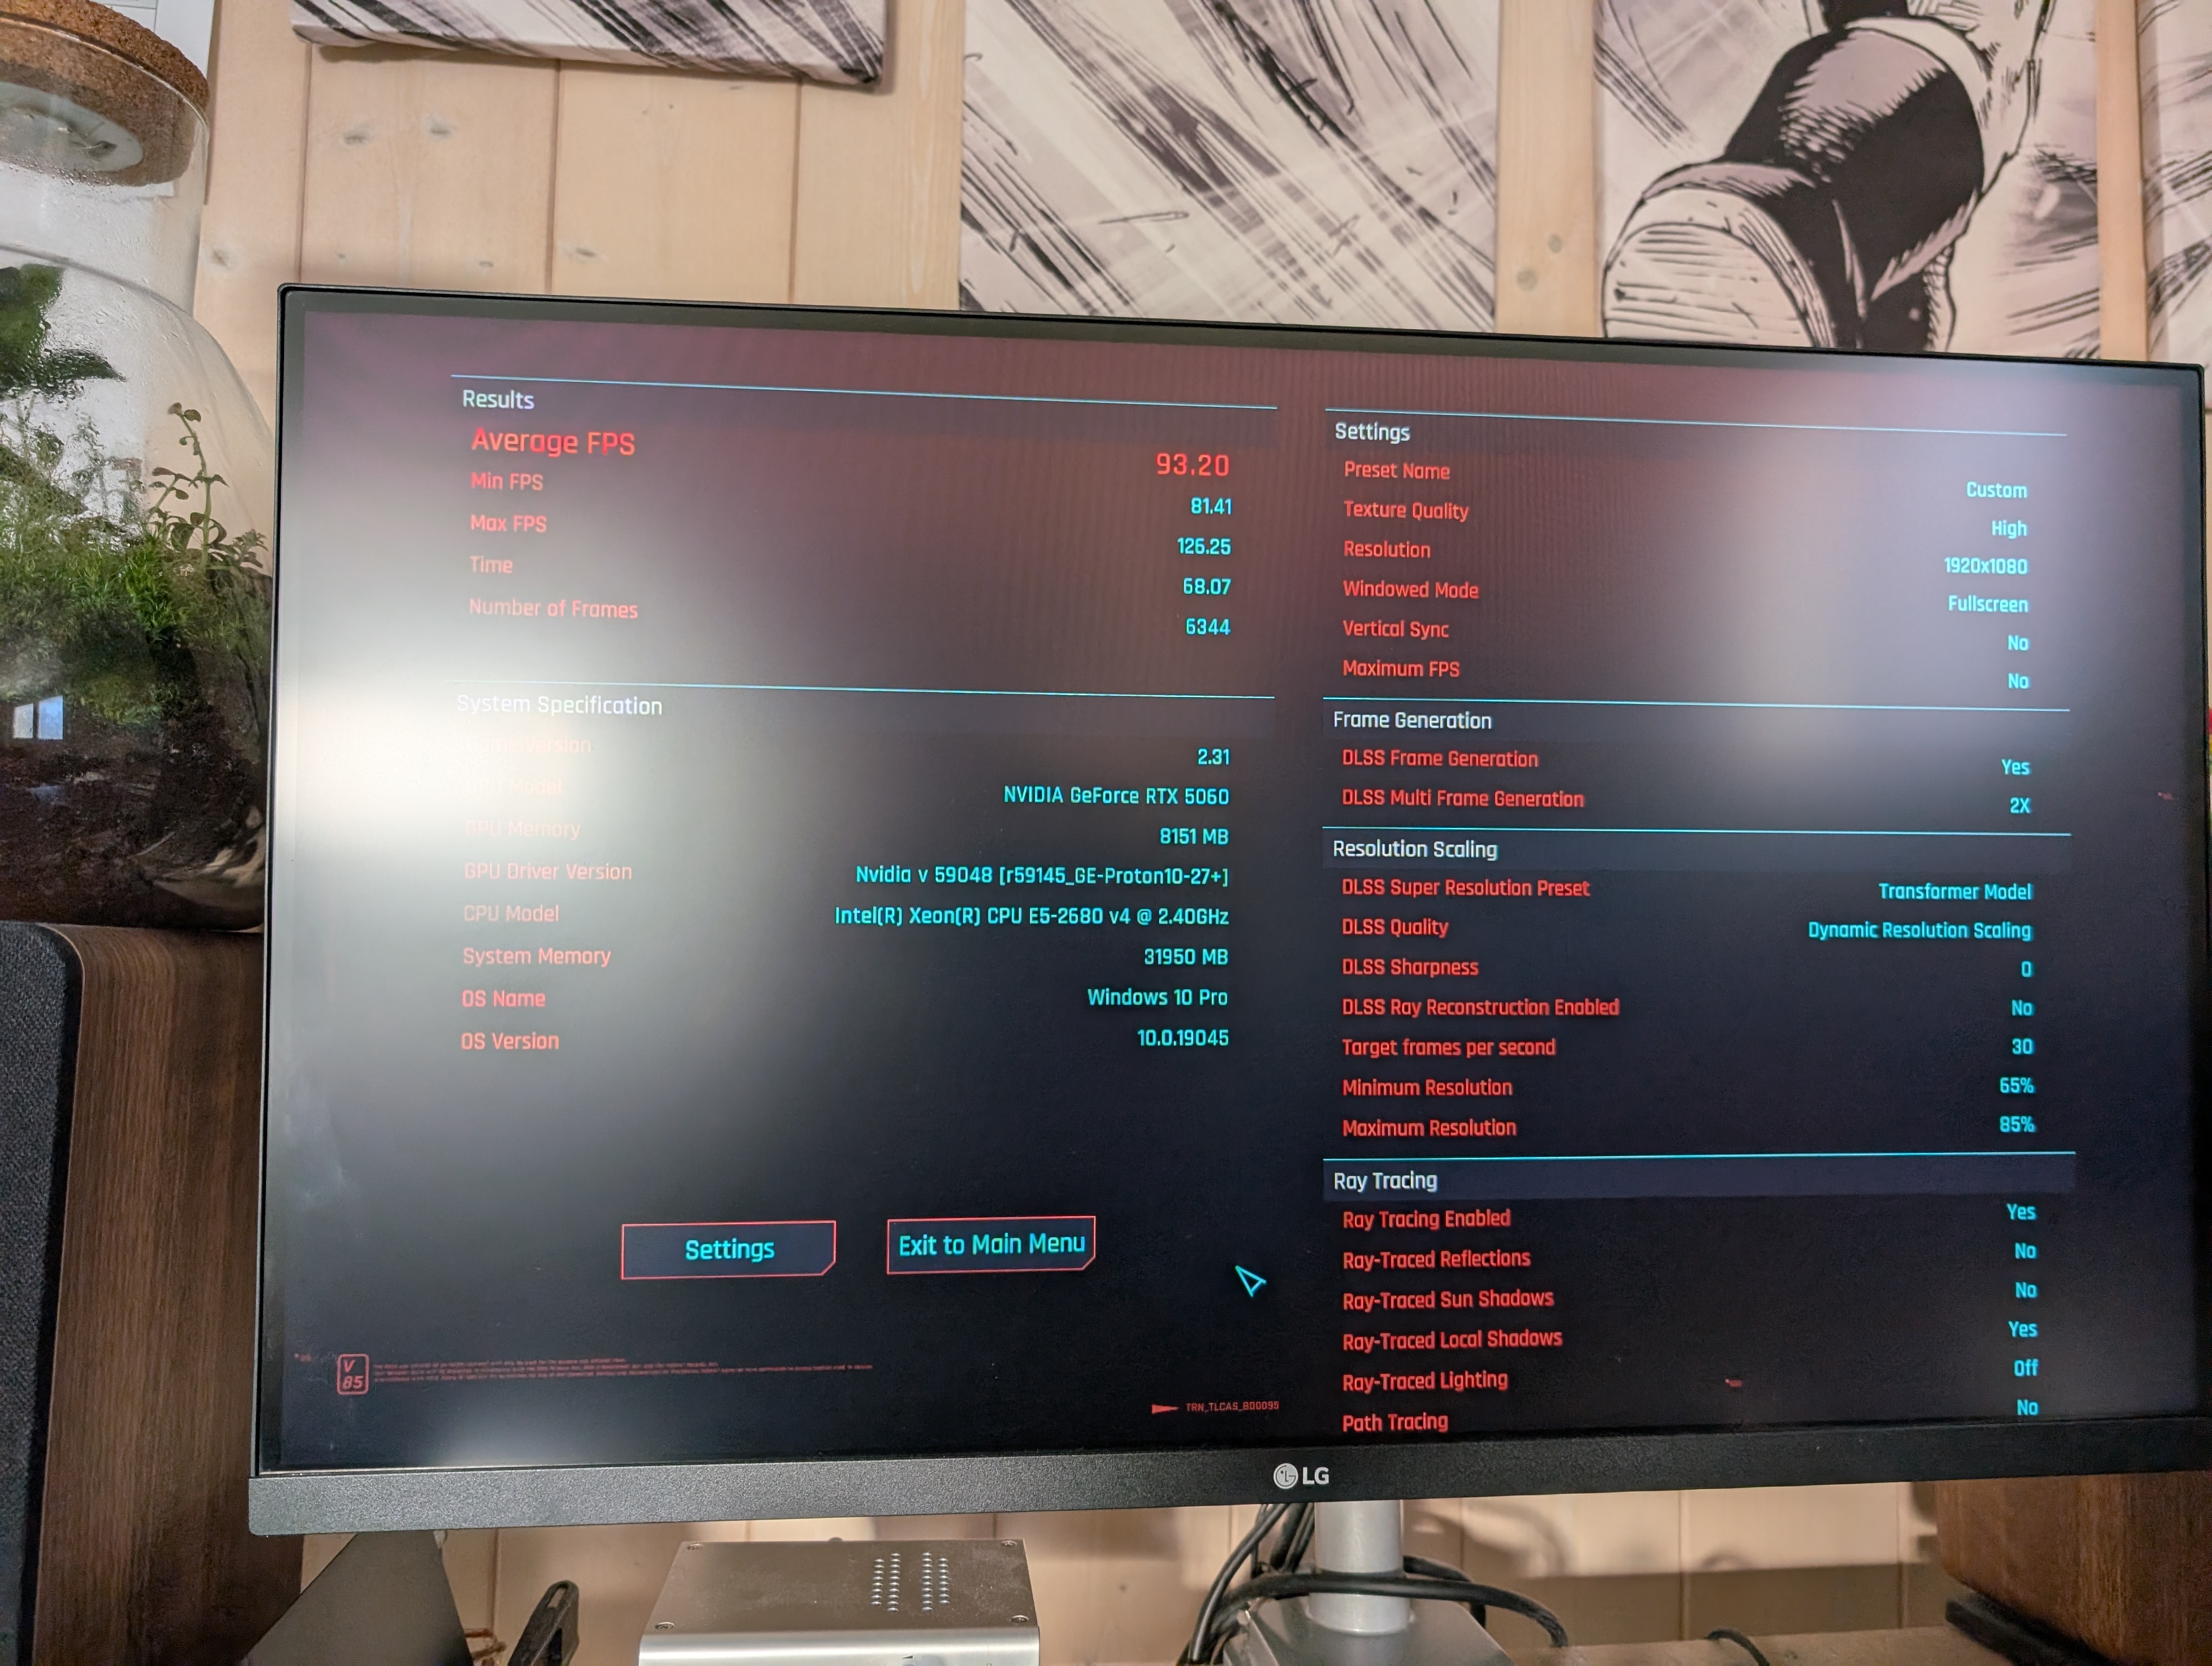
It has a some stuttering on Cyberpunk, but I didn’t find it to be much of a problem during my gameplay session.
Bear in mind:
- it’s all emulated with Proton (this is where you can see the huge strides that have happened in Linux gaming over the years)
- I used the Hero Launcher to access my GOG library. The savegame synchronization even worked!
- you might have to play with some options (changing the Proton build, enabling gamescope, changing the Linux kernel scheduler) for better performance
I managed to play a few (not so demanding) games so far, without much difficulties:
- X4
- Blue prince
- Hollow Knight: Silksong
Can I turn this computer on without having the light to flicker in the house?
Full story short:
- I used a watt-meter (you can see it in some pictures)
- during the Cyberpunk benchmark, I measured around 240W at peak, mostly around 215W
- at rest, doing nothing, the system consumes 90W
To be honest, I thought it would be much worst.
Rushed conclusion
Well, it turns out, there is hope. Or at least, there is fun to be obtained from such a small configuration. All in all, the BOM for this new hardware is around 450€ (motherboard + CPU + RAM + new GPU).
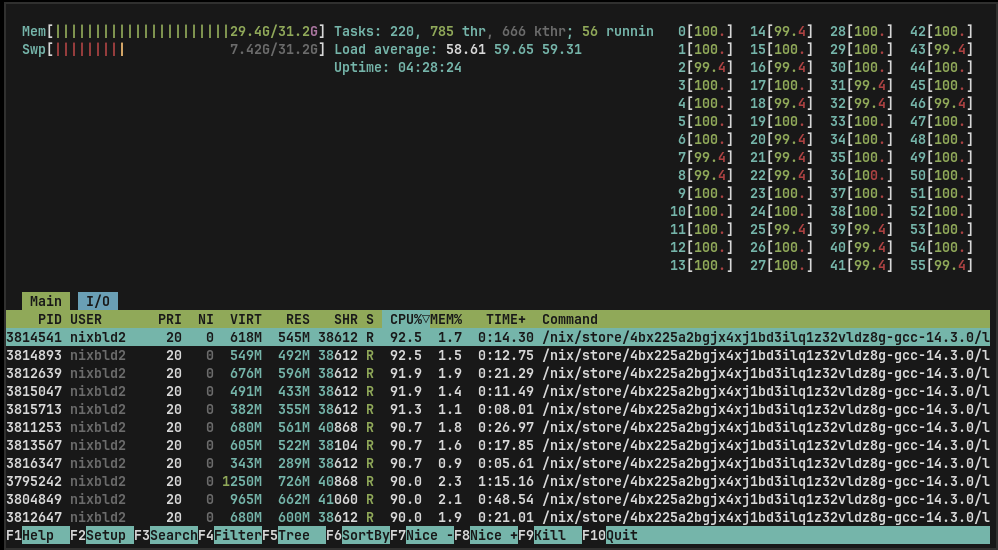
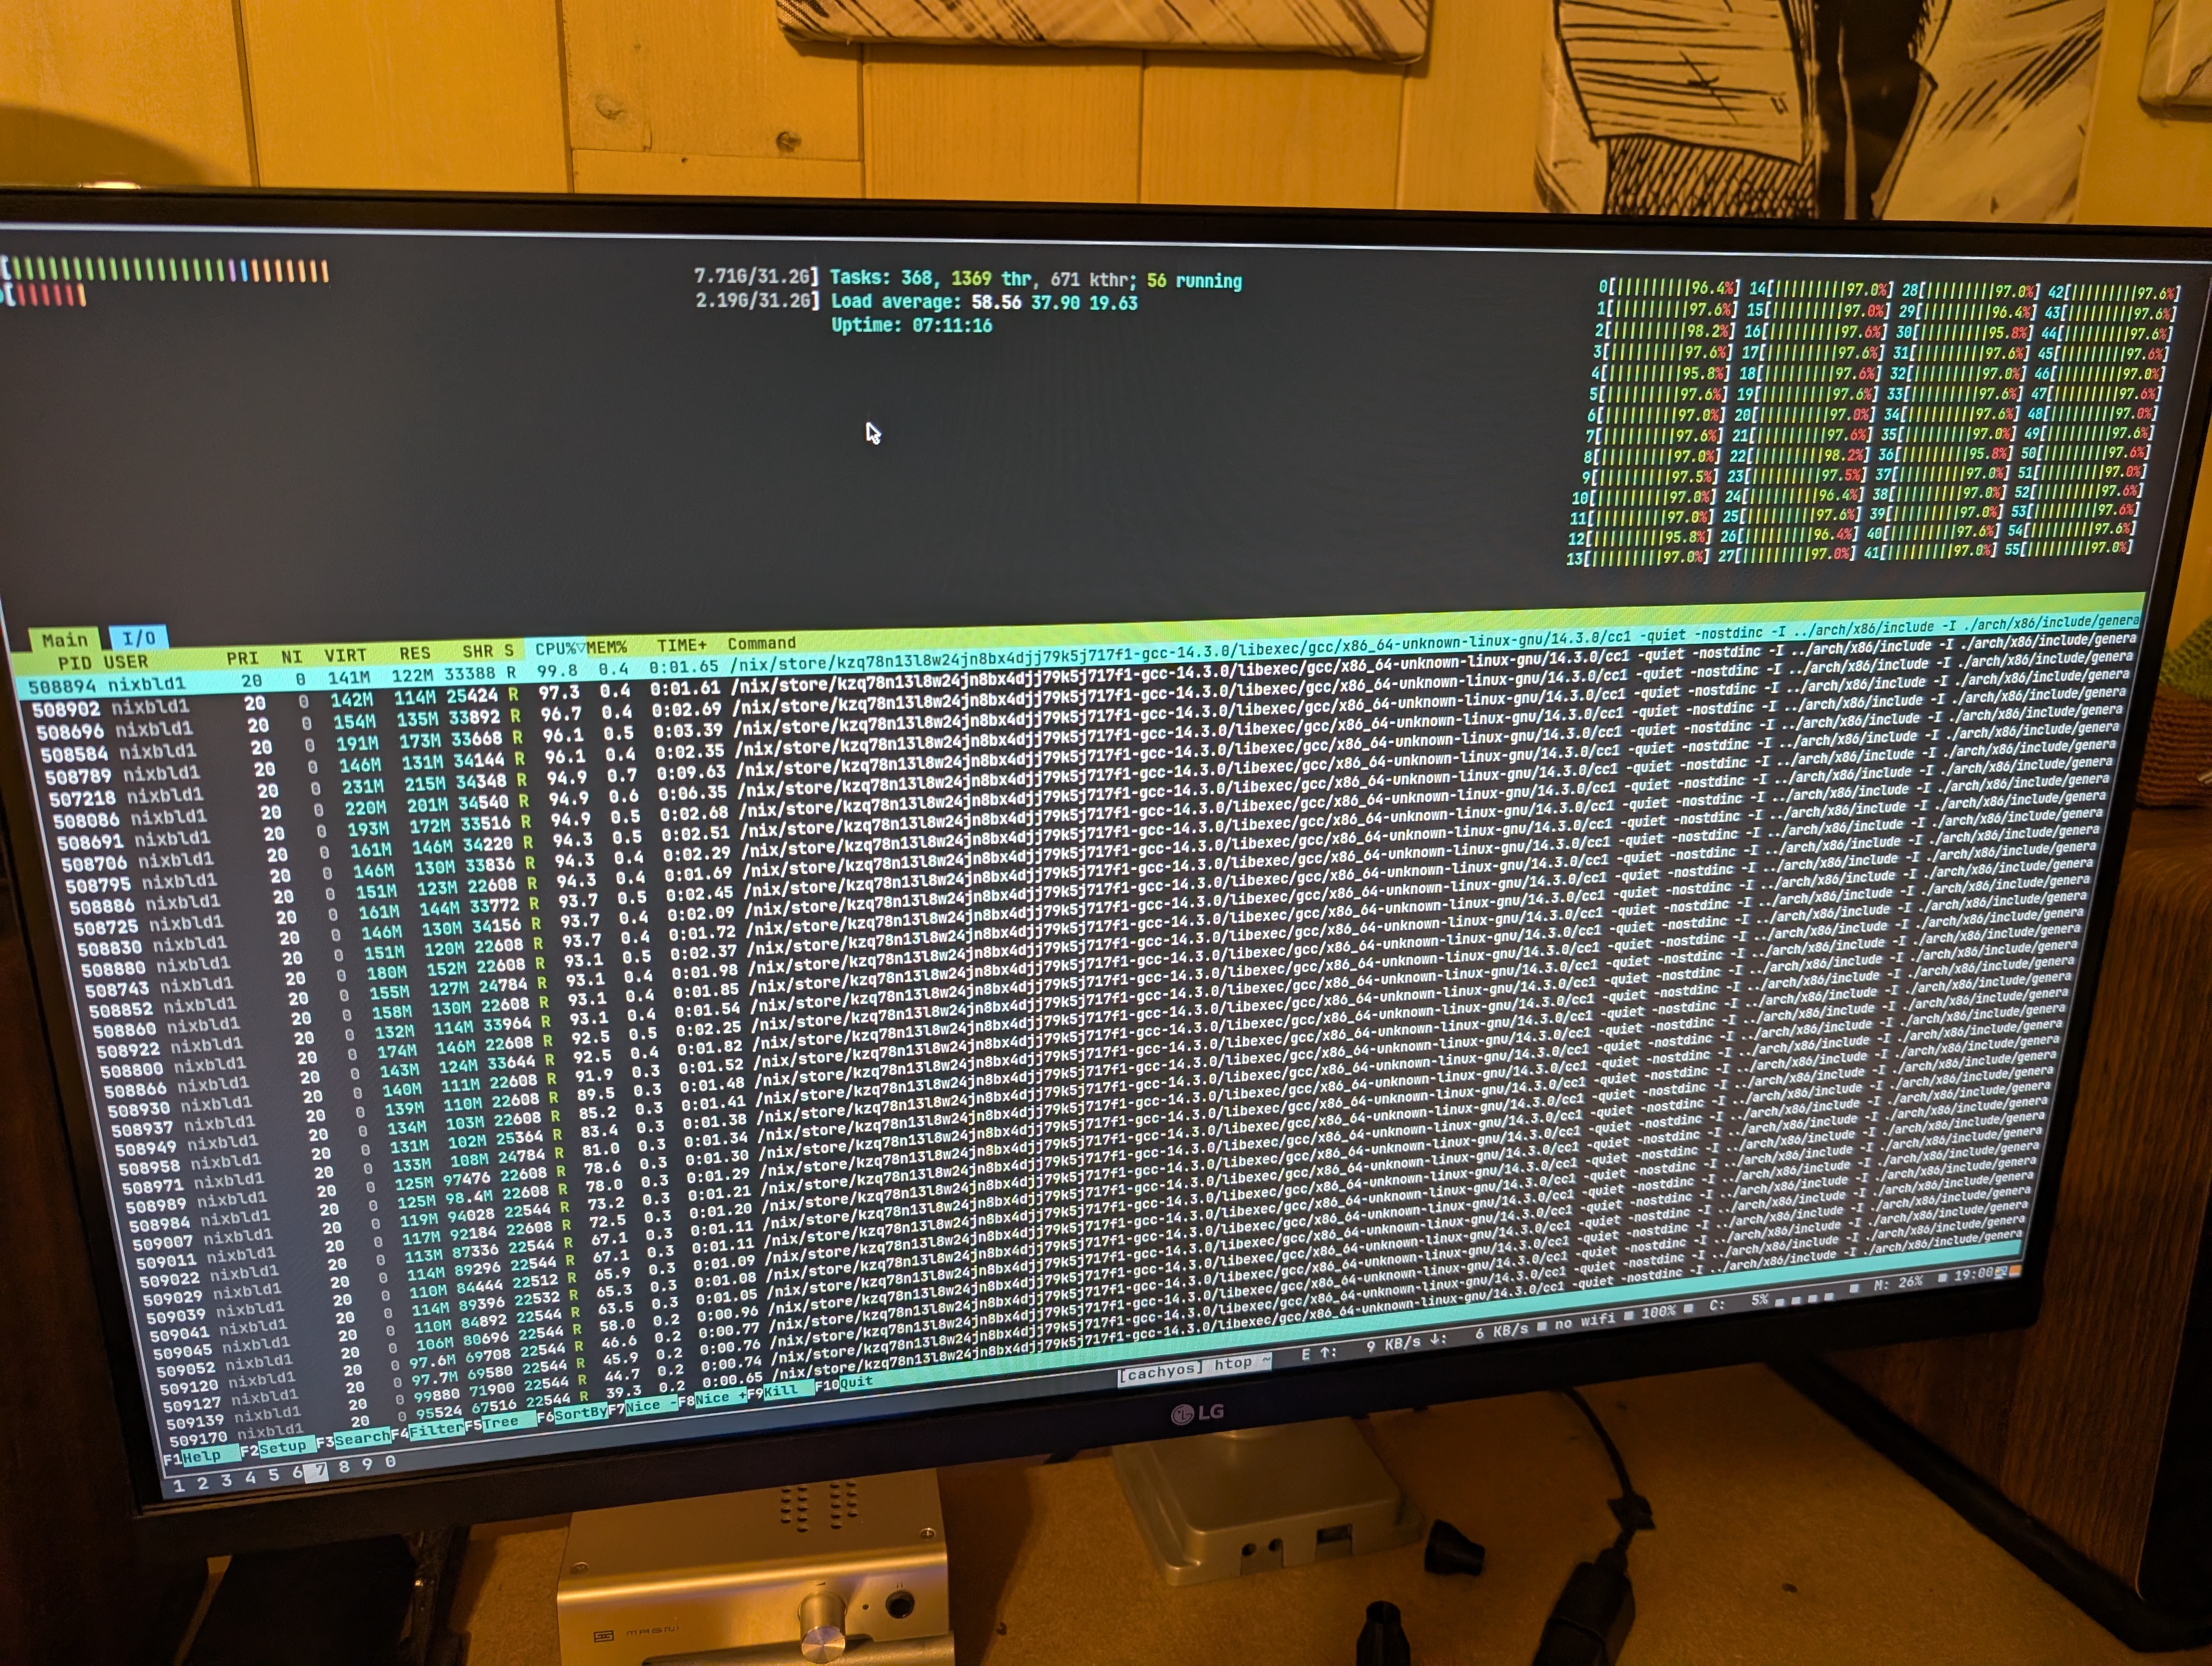
It’s so silly to have that many cores that I tried to recompile my system as if I was back in my Gentoo youth (see the picture, I’m about to be OOMed here):
That’s all folks.
One more for the road:
Misc.
- I enabled Re-bar from the BIOS, applying some of the steps described in this video: Resizable BAR on LGA 2011-3 X99 – how to enable and get extra performance
- during my first attempts, I managed to get a configuration that would not boot anymore
- I didn’t manage to restore access through the CMOS jumper on the motherboard
- I had to remove the graphic card to remove the CMOS CR2032 battery
- I ended up buying a 5m long DisplayPort cable so that I can display from the computer directly. I still use moonlight for the input and the audio, but I’m ignoring the streamed video and I’m having a slightly better picture directly from the computer (240Hz too).
- This build is a beast (compared to my computer). I use NixOS everywhere, and I installed Nix on this build so that I can turn it in a remote builder.